

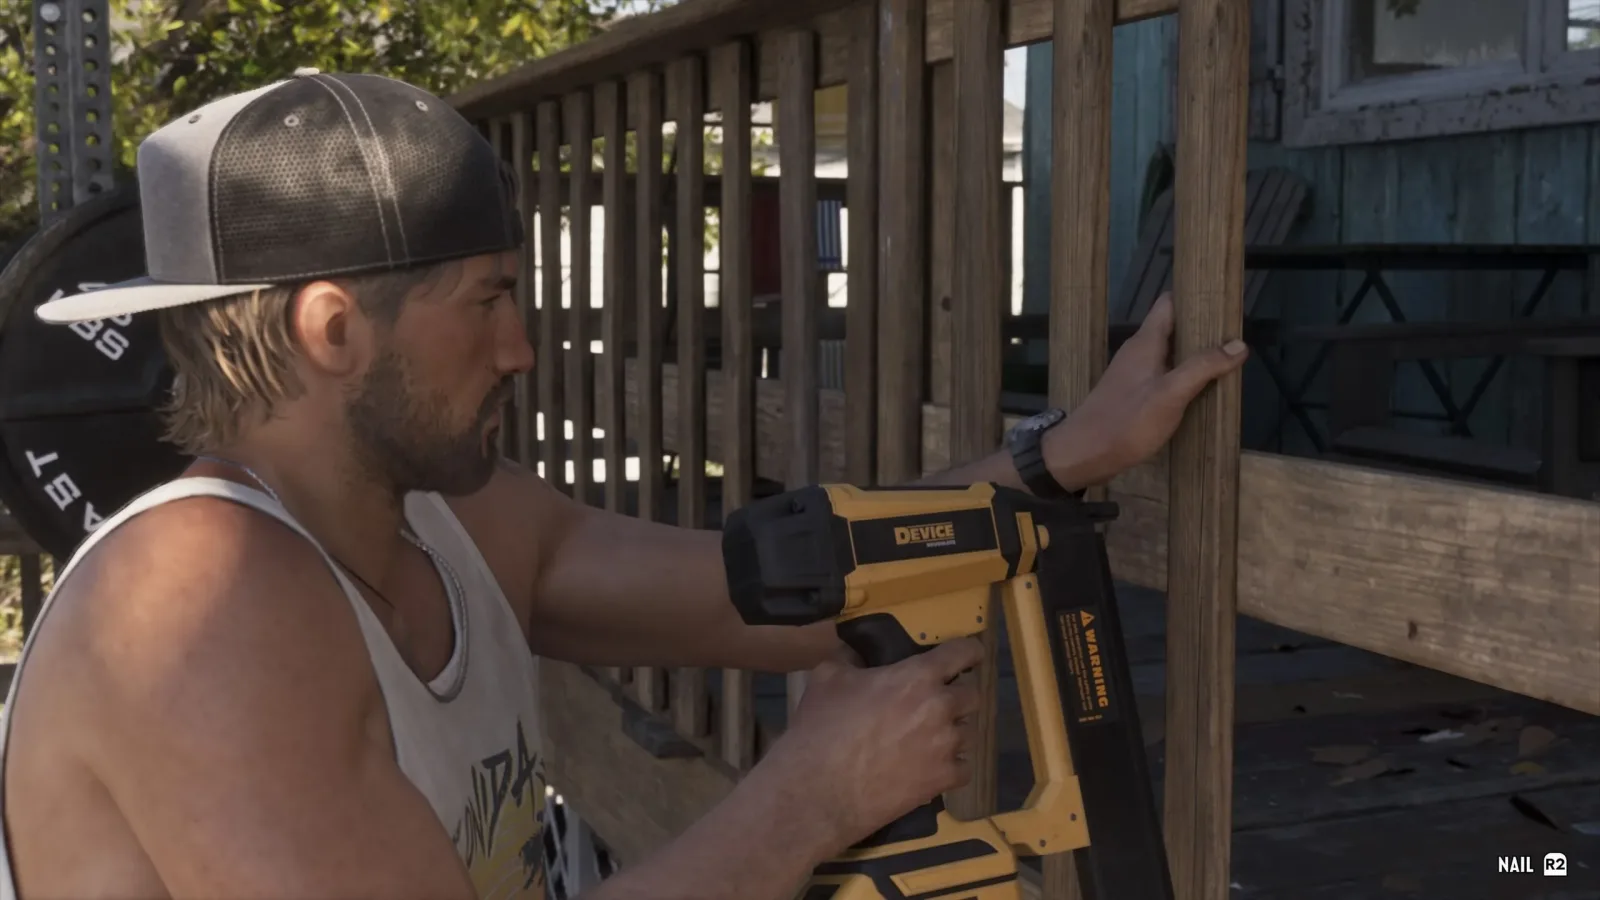
Early in GTA 6, players can spend time improving Jason's home in Key Lento before Lucia is released from prison. The work is optional, but it has a longer-term purpose: completing these domestic projects can have a positive effect on the pair's relationship status later in the game.
One of the available jobs is to fix the railing. It sounds simple, and the broken railing is even easy enough to spot from Jason's deck. The confusing part is that the repair interaction cannot be started from the obvious side. Players who walk straight up to the visible damage from the upper deck may find no prompt at all, making it seem as though they are looking at the wrong object.
The key is to approach the railing from the lower deck. Once there, look for the interaction marker beside the ladder, then complete the short nailing sequence to install the replacement panels. Here is the full route, the controls involved, and why this small repair is worth finishing.
How to fix the railing in GTA 6
- Travel to Jason's house in Key Lento.
- Go through the glass sliding doors near the TV to reach the wooden deck behind the house.
- Look ahead to spot the damaged railing near the deck chairs.
- Do not try to repair it from the upper-deck side.
- Turn left, then use the stairs on the right to descend to the lower deck, where the gym equipment is located.
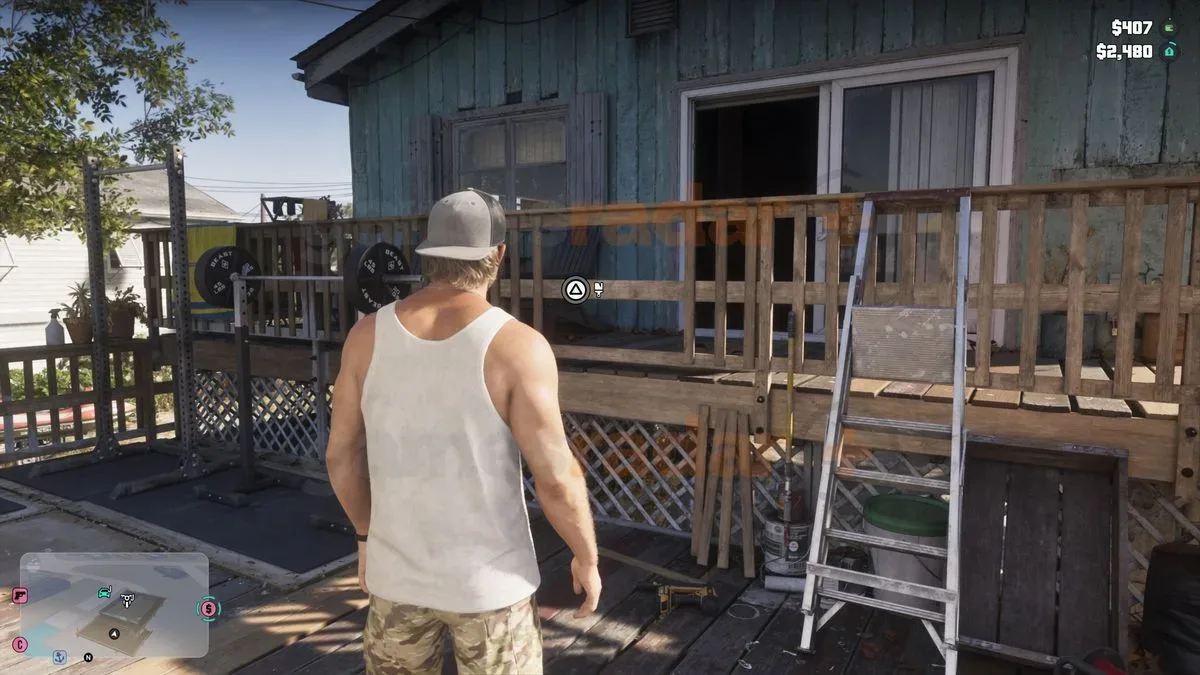
- Face toward the house and move to the railing positioned to the left of the ladder.
- Look for the paintbrush icon that marks the repair interaction.
- Hold the interact button: Triangle on PlayStation or Y on Xbox.
- During the repair, press R2 on PlayStation or RT on Xbox whenever prompted to nail the new panels into place.
Completing the prompted nailing actions finishes the railing job and marks another house project off Jason's list.
For useful background on this topic, read GTA 6 camera controls: How to Change Views and Use First-Person Options.
Where the damaged railing is located
The railing is behind Jason's home, not at the front of the property. Start inside the house and find the glass sliding doors near the television. Passing through them puts you on the wooden decking area.
From this upper deck, the damaged section is directly in view near the deck chairs. That visibility is useful because it confirms that you have found the correct general area. However, the deck's layout means the usable repair position is lower down and around the structure rather than immediately beside the broken-looking section from above.
Turn left after exiting the house. The stairs needed for the route are on the right, leading down to the lower decking. The gym equipment provides a helpful landmark: if you have reached the workout area, you are on the correct level.
At the lower deck, orient the camera and character so that you are facing Jason's house. Find the ladder, then check the railing section to its left. This is the important position. Rather than relying only on visible damage, watch for the paintbrush icon. That symbol confirms the game recognizes the spot as the active repair point.
Why the railing interaction can be easy to miss
This project is less about a complicated minigame than it is about positioning. The broken railing can be seen from the upper deck, which naturally encourages players to search for a prompt there. But the repair is performed from another side of the structure.
That distinction matters. If there is no paintbrush icon where you are standing, do not keep pressing the interaction button or assume the task has failed to activate. Instead, go down to the lower deck and approach the section left of the ladder while facing the house. The icon is the reliable sign that the game is ready for the repair to begin.
The deck chairs, lower-level gym equipment, and ladder create a straightforward chain of landmarks. Use them in that order: begin near the deck chairs on the upper deck, descend toward the gym equipment, then locate the railing left of the ladder. This is more dependable than trying to judge the exact damaged plank from a distance.
Controls for the repair sequence
Once the paintbrush icon appears, hold the interaction button to begin working on the wooden fencing. The button differs by controller family:
- PlayStation: Hold Triangle to interact, then press R2 when prompted.
- Xbox: Hold Y to interact, then press RT when prompted.
The follow-up inputs represent nailing the replacement panels into the railing. Pay attention to each on-screen prompt and press the relevant trigger as it appears. There is no need to search for extra materials or move to another part of the property during this stage; the work is completed at the same interaction point.
If the sequence does not start, double-check that you are not standing on the upper deck facing the railing near the chairs. Return to the lower level, face the house, and search beside the ladder for the paintbrush marker. Starting from the correct location is the main requirement.
All of Jason's house projects
The railing is one of five available improvement tasks at Jason's home during this part of GTA 6. Together, they turn the worn-down property into a more comfortable and functional place to live. The full set of projects consists of:
- Fixing the steps.
- Repairing the leaky roof.
- Fixing the wall.
- Painting the wall.
- Fixing the railing.
Each job focuses on a different piece of the house, so the railing should be treated as part of a broader cleanup effort rather than an isolated objective. The home's condition is initially rough, and the list includes both practical fixes, such as stopping leaks and repairing access points, and cosmetic work, such as painting the wall.
Because these activities are optional, players can choose whether to complete them while progressing through the opening chapter. Still, the relationship benefit gives them more weight than ordinary environmental busywork. For players interested in improving Jason and Lucia's standing with one another, finishing every available home project is the sensible approach.
Should you repair the railing?
Yes, particularly if you are aiming to complete the set of house improvements before Lucia leaves prison. Fixing the railing contributes to the optional home restoration work and can positively affect the relationship status that becomes relevant later.
It is also a quick task once the correct spot is known. The potentially time-consuming part is simply locating the lower-deck interaction point. After that, the process is limited to holding the initial interaction button and responding to the nail prompts with RT or R2.
There is no reason to leave the railing unfinished if you are already working through the house list. The project is close to the other landmarks around the rear deck, and its completion removes one more outstanding repair from the property.
Quick troubleshooting checklist
If you are having trouble getting the railing fixed, run through these points:
- Are you behind the house? Use the glass sliding doors near the TV to access the rear deck.
- Can you see the railing near the deck chairs? That identifies the damaged area, but it is not the side used for the interaction.
- Have you gone downstairs? Take the stairs after turning left from the upper deck.
- Are you near the gym equipment? This confirms you are on the lower decking.
- Are you facing the house? From that direction, the target railing is to the left of the ladder.
- Do you see the paintbrush icon? Wait until it appears before attempting to interact.
- Are you using the required inputs? Hold Triangle/Y to start, then use R2/RT for the nailing prompts.
With those steps followed, the railing repair should be completed quickly. The important lesson is that GTA 6's environmental tasks may place the visible damage and the actual interaction point on different sides of an object. In this case, the lower deck is where Jason can properly get to work.
Finish the panels, check the railing project off the list, and continue restoring the Key Lento house alongside the steps, roof, and walls. It is a modest job, but it helps transform the property from a ramshackle home into a better place for Jason and Lucia's next chapter.
Community
Discussion
Start the conversation.
No comments have been posted yet.