

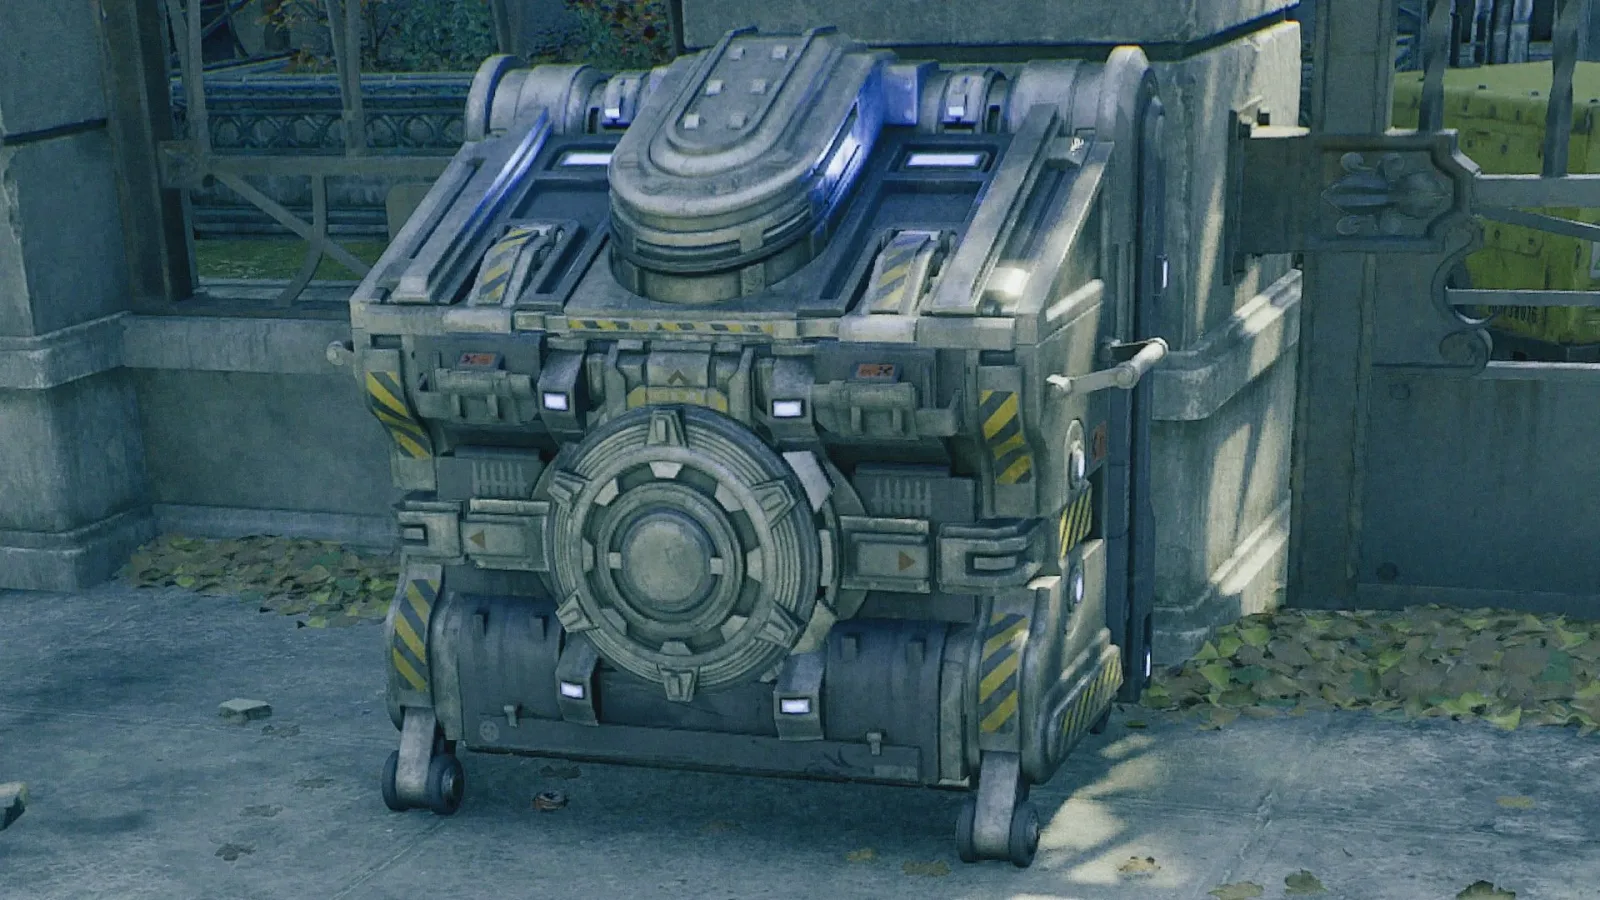
Gears of War: E-Day begins opening its upgrade possibilities in earnest once players reach Act 2, Chapter 2. At that point, the map becomes considerably more flexible, letting Marcus and Dom range across the area in search of Hardcases, side objectives, weapon parts, extra modification slots, and armor upgrades. It is a welcome change of pace after the more directed opening missions, but it also means there is suddenly a lot of gear to consider.
Not every mod is equally valuable. Some upgrades provide useful but narrow benefits, while others improve the weapons that are likely to carry a campaign run: the Longshot for priority targets, the Prototype Lancer for regular combat, and the Snub as an emergency sidearm. A few armor pieces can also make cover-based firefights far more forgiving. For players who want the most immediate impact from their exploration, these are the builds worth working toward and the locations currently known for their key components.
How mods, Hardcases, and slots work in Act 2
The upgrade hunt is tied primarily to Hardcases scattered around the Act 2 map, although side quests can also reward equipment. A Hardcase may contain a specific weapon mod, an additional slot that allows a weapon to hold more modifications, or another useful upgrade. That distinction matters: finding the right attachment does not always mean it can immediately be equipped alongside everything else players want to use.
As a result, the strongest early approach is not simply to grab every case at random. Focus on obtaining mods for weapons with clear jobs in the loadout, then seek the slot unlocks that let those upgrades work together. The Longshot benefits enormously from precision-oriented pieces, the Prototype Lancer has excellent interactions between its chainsaw-focused upgrade and damage perks, and armor can reinforce the cover-and-push rhythm that defines many encounters.
For useful background on this topic, read Kanto Tactics Brings Grid-Based Pokémon Battles to the Browser.
Some ideal builds remain incomplete because further mods or slots have not yet been confirmed. That does not diminish the usefulness of the parts already available; it just means players should keep checking unexplored Hardcases and completing optional tasks as they progress.
Best Longshot build: make every round count
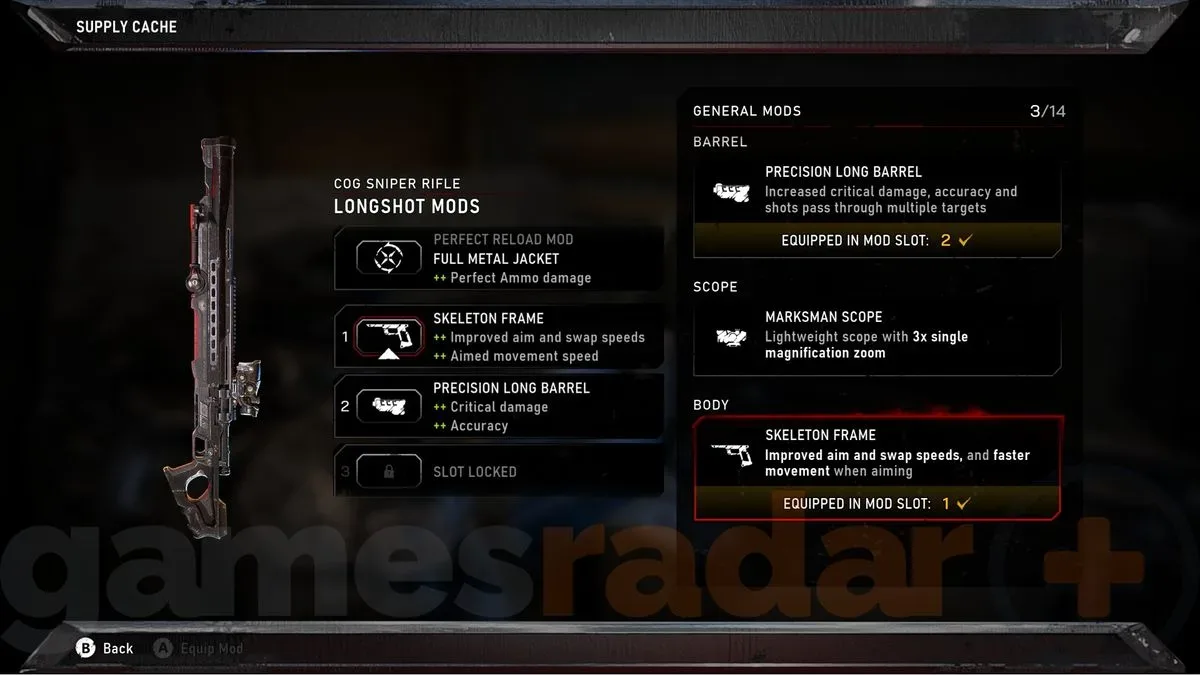
The Longshot remains one of the most decisive weapons in the game when used carefully. Its strength is simple: a successful shot can eliminate an enemy outright, allowing players to remove opposing marksmen and other dangerous targets before the fight becomes crowded. It also has enough stopping power to be valuable against closer threats when there is no time to swap weapons.
Recommended Longshot mods
- Full Metal Jacket
- Default Skeleton Frame
- Forged Barrel
Full Metal Jacket is a natural foundation for the rifle, while the default Skeleton Frame remains a suitable fit for the build. The standout is the Forged Barrel, which improves the Longshot's effectiveness and helps the rifle serve as more than a distant-target tool. The weapon's standard scope is already capable enough for its intended ranges, so a scope replacement is not an essential priority.
Accuracy is especially important because the Longshot requires a reload after each shot. Missing means losing momentum and potentially surrendering a safe firing window. The recommended setup therefore favors reliable shot placement and damage rather than trying to force the rifle into a role it was not made for. If a magazine-capacity mod becomes available later, it would be a particularly meaningful addition, but that upgrade has not yet been identified for this build.
Longshot mod locations
- Skeleton Frame: Found in a Hardcase south of Monroe Library.
- Forged Barrel: Found in a Hardcase beneath the Gears statues during Act 2, Chapter 3.
- Additional mod slots: A Hardcase near the bloody fountain in Act 2, Chapter 2 contains a slot upgrade.
Players moving through the early open-map segment should make the bloody fountain slot upgrade a priority, then continue collecting the barrel as the campaign reaches Chapter 3. The Longshot does not need a crowded attachment list to shine. Its best setup is about supporting the weapon's already powerful single-shot identity.
Best Prototype Lancer build: the all-purpose campaign workhorse
The Prototype Lancer is the weapon most likely to stay in hand through the widest variety of situations. It is useful from cover, dependable when advancing with a squad, and defined by its chainsaw attachment when enemies get too close. Its optimal mod setup leans into all of those strengths rather than specializing too heavily in a single range.
Recommended Prototype Lancer mods
- Full Metal Jacket
- Chainsaw Autoloader
- Holo Sight
- Cover Brace
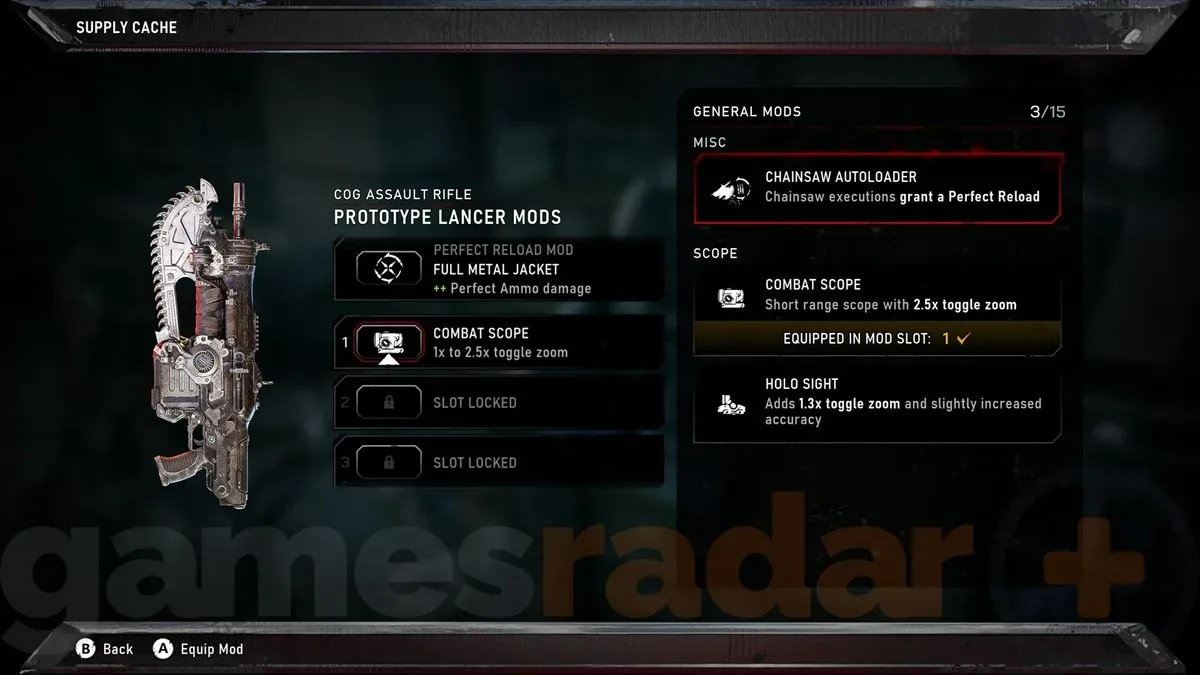
The most important pickup is arguably the Chainsaw Autoloader. It has particularly strong synergy with Full Metal Jacket, turning the signature close-range execution tool into an even more rewarding answer to enemies that breach the player's position. Since the Prototype Lancer is intended to be used throughout an encounter rather than saved for a narrow situation, that kind of practical interaction is extremely valuable.
The Holo Sight is another high-priority attachment because its zoom can be toggled only when needed. That flexibility means players are not locked into an awkward view while fighting at close or medium distances, but can still tighten their aim when targets are further away. It is a clean quality-of-life choice for a rifle meant to handle changing battlefield conditions.
Cover Brace rounds out the build. Much of the Prototype Lancer's regular use happens from behind cover, and this mod makes that positioning more effective. Once the weapon has its three extra mod slots available, the combination gives the Lancer a well-rounded identity: reliable bullet damage, better aimed fire, cover utility, and a chainsaw benefit when the battle turns personal.
Prototype Lancer mod locations
- Chainsaw Autoloader: Acquired during the early campaign mission titled Gear Up.
- Holo Sight: Located in a Hardcase on the first floor across the street from Carter's Place.
- Cover Brace: Located in the Hardcase west of the Courthouse.
- Additional mod slots: The same Hardcase west of the Courthouse provides extra slots.
Because the Courthouse case supplies both Cover Brace and the ability to equip more attachments, it is one of the most useful early detours for players committed to the Prototype Lancer. Getting the Autoloader through the main campaign first also makes this path straightforward: by the time the open map encourages wider exploration, the core of the build is already in place.
Best Snub build: improve the emergency option
The Snub will not usually be the centerpiece of a player's combat plan. Still, sidearms matter when a primary weapon is empty, when ammo is scarce, or when an enemy suddenly closes the distance. The sensible approach is not to overinvest in elaborate Snub experimentation, but to make it accurate and give it more rounds before a reload is necessary.
Recommended Snub mods
- Full Metal Jacket
- Aim Stabilizer
- Extended Mag
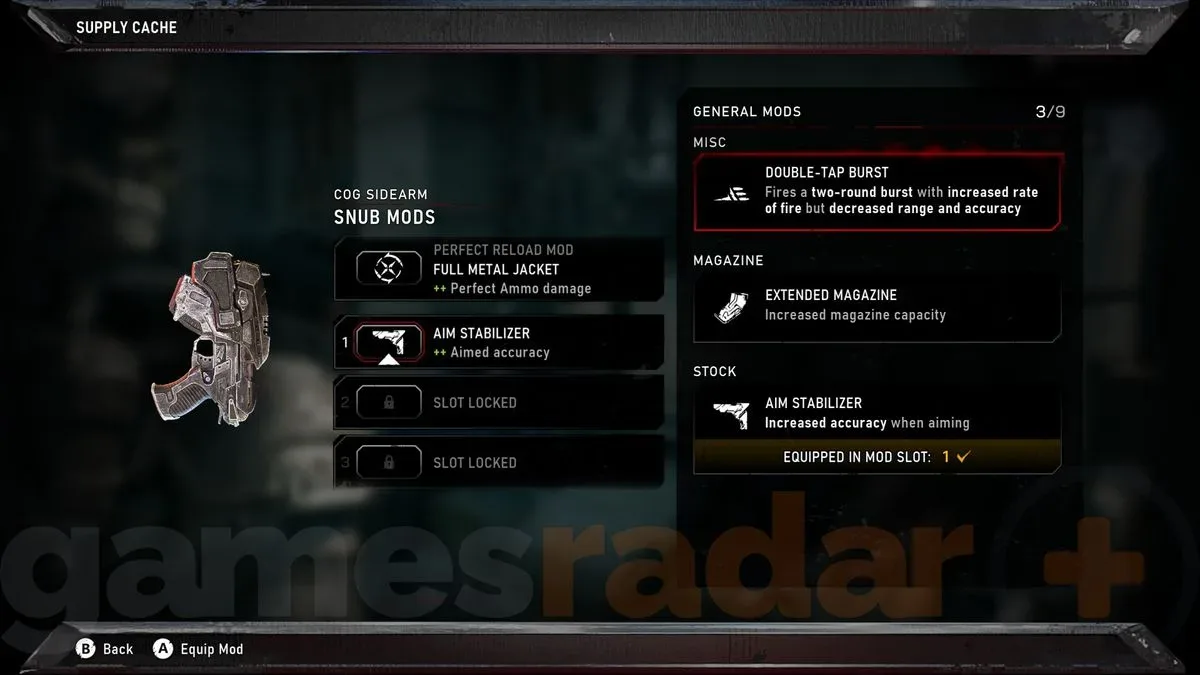
Aim Stabilizer and Extended Mag are uncomplicated improvements, but that is exactly why they work. Better handling helps make hurried shots more dependable, while extra ammunition gives the sidearm more value during a desperate weapon swap. Combined with Full Metal Jacket, this is a practical fallback build rather than a gimmick.
Snub mod location
- Aim Stabilizer: Found in a Hardcase south of the Bank of Tyrus.
Extended Mag is the default component in this setup. Additional Snub slot upgrades and other possible improvements have not yet been confirmed, so players should treat the build as a strong baseline and continue searching Hardcases as they uncover more of the map.
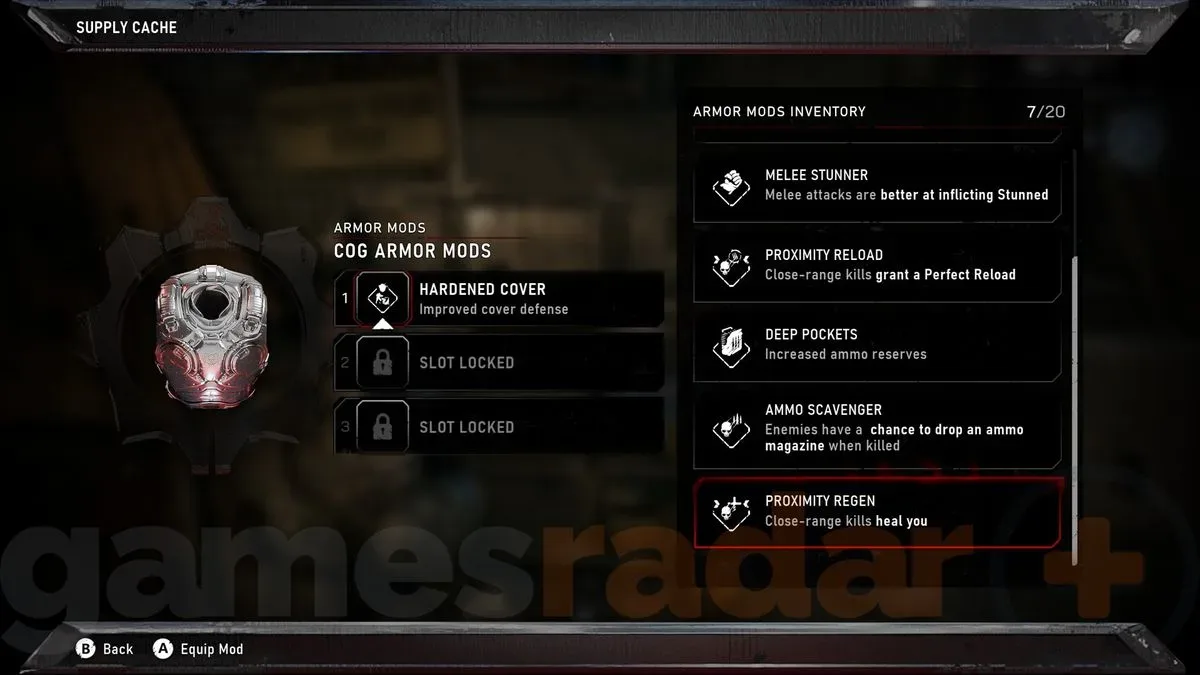
Best armor mods: stay alive in cover and recover after close kills
Weapon upgrades attract the most attention, but armor mods can change how safely players move through the campaign's aggressive encounters. The recommended armor combination supports a familiar Gears combat loop: take cover, trade fire, push when there is an opening, and capitalize on close-range kills.
Recommended armor mods
- Hardened Cover
- Rock Steady
- Proximity Regen
Hardened Cover improves resistance to incoming fire while the player is protected behind cover. That makes it valuable in nearly every sustained firefight, particularly against enemies that can punish poor positioning. Rock Steady helps accuracy while firing, offering a broadly useful benefit that complements both rifles and sidearms.
The more aggressive piece is Proximity Regen. It provides automatic health recovery after enemies are killed at close range, creating a strong payoff for pushing forward at the right moment. It should not encourage reckless charges, but it can help restore momentum after a chainsaw kill or other close-quarters finish.
Armor mod locations
- Hardened Cover: Found in a Hardcase outside Amberstone Storage.
- Rock Steady: Also found in a Hardcase outside Amberstone Storage.
- Proximity Regen: Found in a Hardcase beneath the flyover at the southern end of the Chapter 2 map.
The flyover location is notable because it is near the site of an especially grim story scene. Players exploring the southern section of the map should search beneath it carefully for the cache.
What to collect first
For the best immediate return, start with the Prototype Lancer path: obtain the Chainsaw Autoloader through Gear Up, then head for the Courthouse area for Cover Brace and its slot unlocks. After that, the armor cache outside Amberstone Storage offers two useful upgrades in one stop. Players who rely heavily on precision shooting should prioritize the Longshot's slot upgrade near the bloody fountain, followed by the Forged Barrel in Chapter 3.
The overall goal is not to make every gun equally upgraded. It is to build a dependable kit with distinct answers for different problems: a Longshot for lethal precision, a Prototype Lancer for day-to-day firefights and close pushes, a Snub that remains useful when things go wrong, and armor that rewards smart cover use. With those pieces in place, Act 2's optional exploration pays off with meaningful combat advantages rather than just a collection of spare parts.
Community
Discussion
Start the conversation.
No comments have been posted yet.