

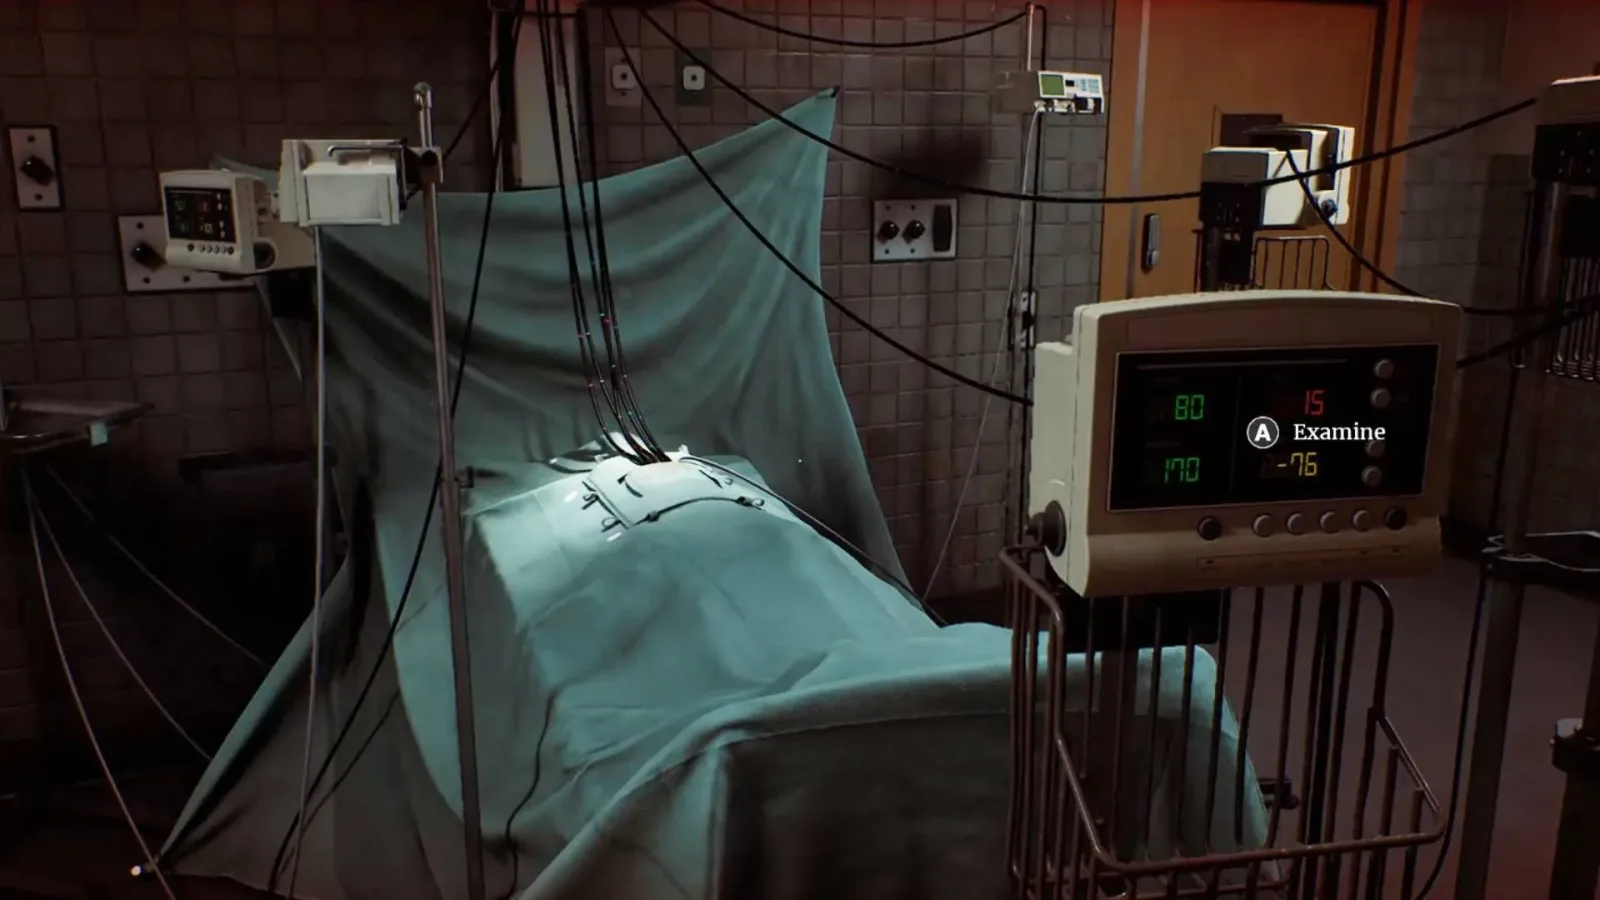
The vital signs puzzle in Silent Hill Townfall asks players to provide a doctor communicating over an intercom with three pieces of patient information: blood pressure, pulse, and blood oxygen saturation. It sounds simple at first, but the room is filled with multiple monitoring machines, each displaying competing numbers. Choosing the wrong unit does not merely delay progress; it damages the player character.
The key is not to guess based on which reading seems medically normal. Townfall provides a deliberately counterintuitive equipment guide on a nearby laptop, and the puzzle depends on reading its wording closely. The machine manual explains which readings should be considered unreliable, allowing players to eliminate the incorrect monitors and report the values that meet the doctor's requests.
Here is how to work through each stage of the vital signs puzzle, what to look for on the laptop, and why some of the values may shift slightly while you are interacting with the equipment.
How the vital signs room works
When the doctor requests a reading, look around the room for the vital-sign monitors rather than immediately activating the closest one. Several machines can be reached, and their displays use different colors for the categories relevant to the puzzle. Incorrect interactions result in damage, so taking a moment to verify the instructions is much safer than trying every possible monitor.
For useful background on this topic, read Genshin Impact 7.1's Vesna Is Turning Heads as a Powerful DPS and Exploration Specialist.
The essential item is the laptop in the corner of the room. Open it, enter the Equipment Overview menu, and select Valentudo View S-100. This entry acts as an instruction manual for the monitors. It describes circumstances where particular measurements should not be trusted. Those warnings are the actual solution logic.
Each requested reading has a corresponding display color:
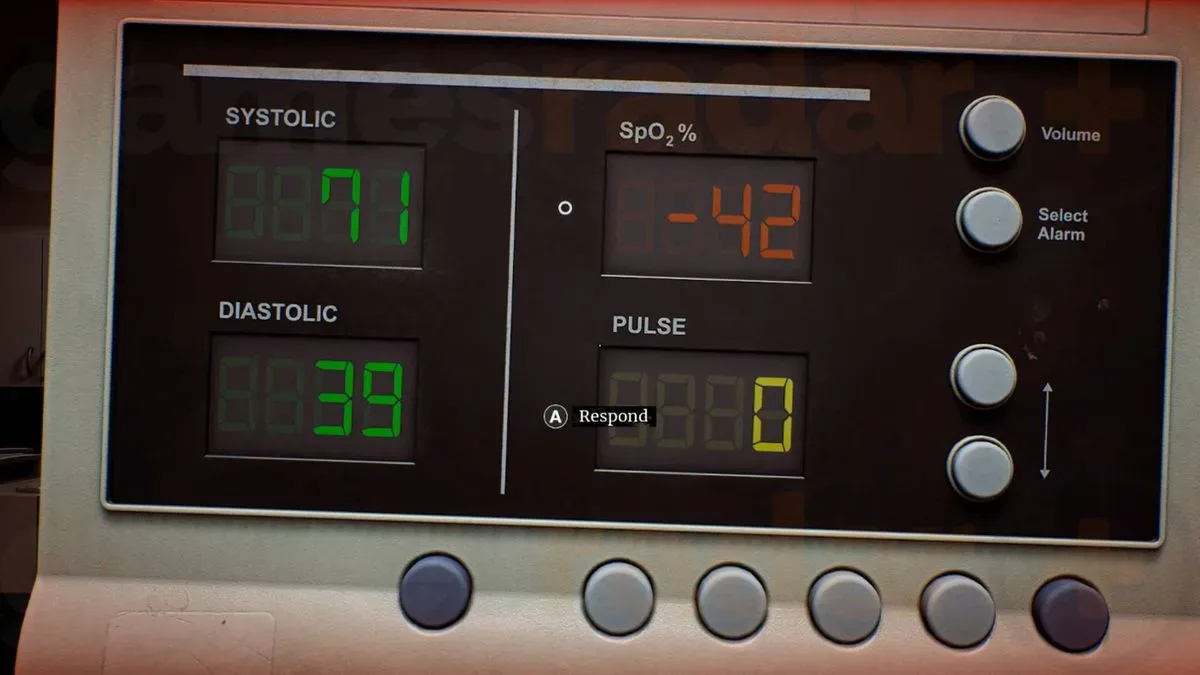
- Green numbers on the left side of a monitor are the systolic and diastolic blood-pressure figures.
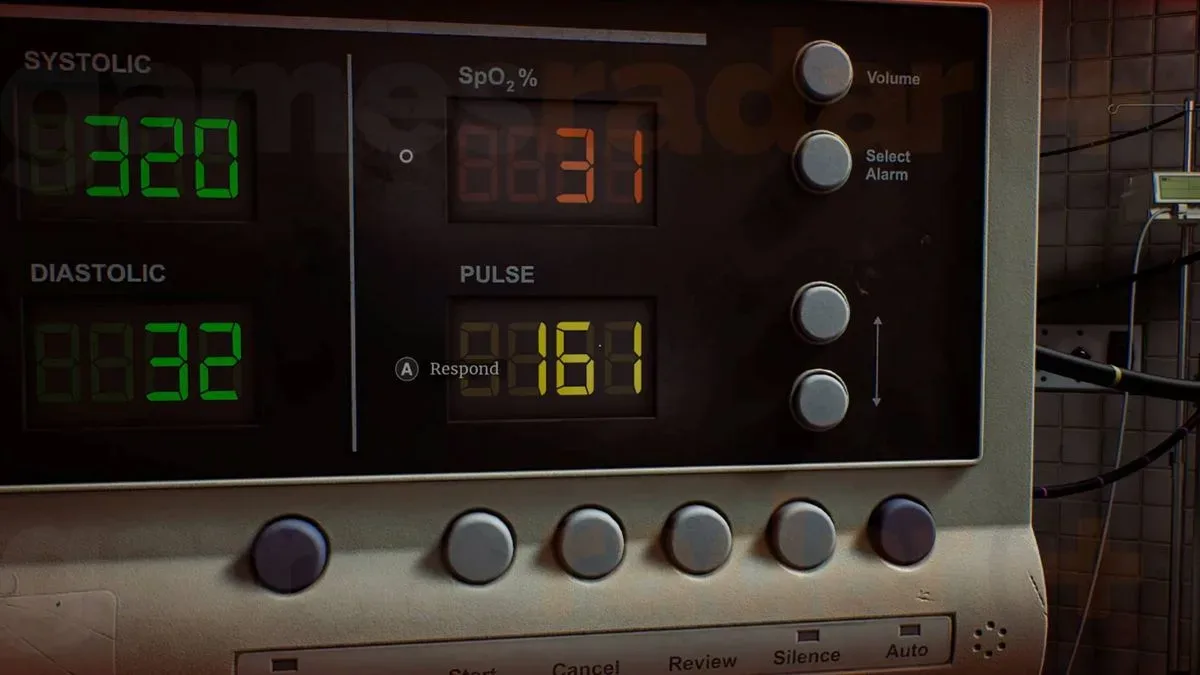
- Yellow numbers identify the heart rate, also called pulse, measured in BPM.
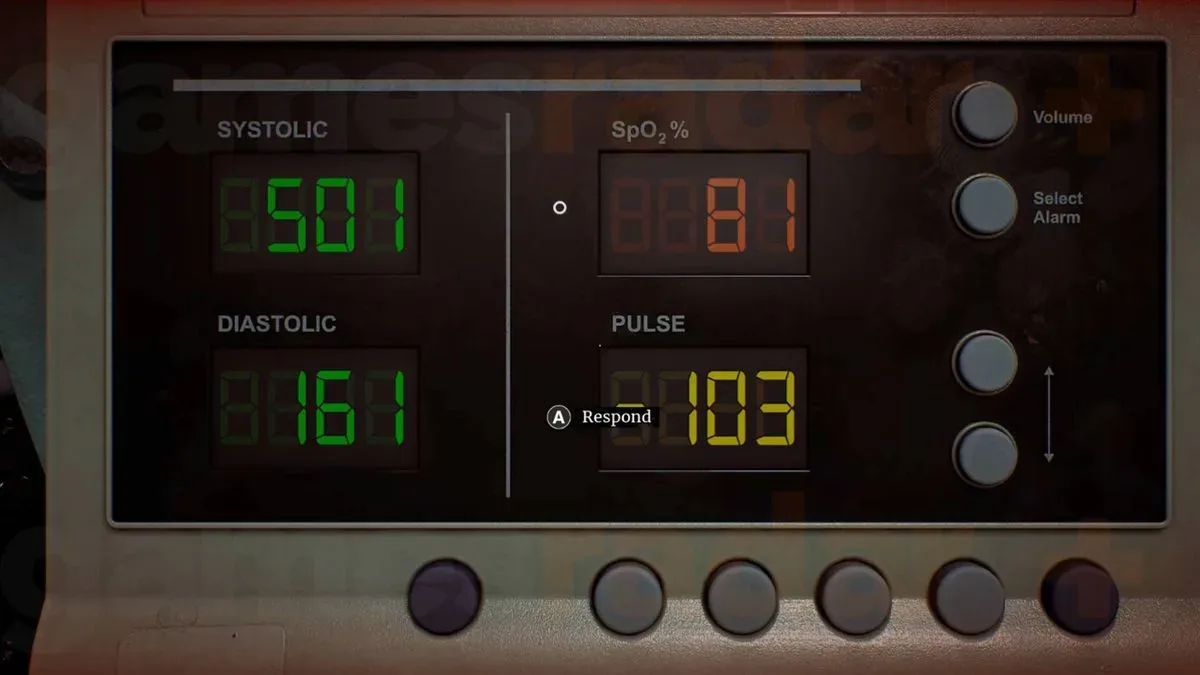
- Red numbers show SpO2, the blood oxygen percentage.
Do not assume that all three answers will come from the same machine. The goal is to identify the monitor whose relevant number matches the reliability criteria in the laptop manual at that moment. Once the correct monitor is found, interact with it and provide the requested result to the doctor.
Blood pressure answer: check the green systolic and diastolic values
For the blood-pressure request, open the Valentudo View S-100 documentation and focus on the line concerning blood pressure. The equipment overview says to disregard values outside of 70/100 mmHg.
This instruction points to the green blood-pressure figures on the left side of each monitor. Examine the available machines and look for the reading that fits the parameters described in the manual. In the observed sequence, the appropriate blood-pressure display alternated between 71/39 and 70/40.
The slight variation is important. Townfall may update the displayed figures between the moment you inspect the monitor and the moment the answer is communicated. Do not panic if the number changes by one point. A movement from 71/39 to 70/40 is consistent with the correct machine still being selected, rather than evidence that you have made a mistake.
The practical approach is to identify the monitor using the manual's reliability clue first, then report the value it is currently displaying when the game prompts you. If you are uncertain, return to the laptop and reread the blood-pressure line instead of interacting randomly with another unit.
Blood pressure troubleshooting
The wording of the blood-pressure instruction can be easy to misread because blood pressure is presented as two numbers rather than one. Make sure you are looking at the green figures, not a nearby yellow BPM value or red oxygen percentage. The relevant answer is the paired systolic/diastolic-style reading.
If your display differs slightly from 71/39 or 70/40, prioritize the machine that satisfies the Valentudo View S-100 guidance. The puzzle's monitor values can fluctuate, so treating the observed figures as a fixed universal code rather than a reference point may lead to confusion.
Pulse answer: find a yellow BPM value above the unreliable range
When the doctor asks for the patient's heart rate or pulse, return to the same laptop entry. The Valentudo View S-100 manual states that Heart Rate (BPM) values outside of 40 to 160 BPM are often inaccurate.
This means you need to inspect the yellow heart-rate readings and locate the one that falls outside the stated 40-to-160 BPM range. In the observed puzzle setup, the correct monitor showed 161 BPM. By the time the reading was reported, it had changed to 162 BPM.
That small increase is another reminder that these machines are not necessarily static. What matters is that you found the correct yellow reading through the equipment manual's rule. If the display ticks upward during the interaction, provide the current number shown by the valid monitor.
It is tempting to select a pulse that looks comparatively ordinary, especially since values above 160 BPM would be alarming in a real medical setting. But this is a game puzzle, and the manual tells you which values should be dismissed. Follow its stated rule rather than trying to apply outside medical assumptions to the scenario.
Why the pulse step causes mistakes
The pulse clue uses language about readings being inaccurate outside a specified range. Because several monitors are visible and the player takes damage for errors, it is easy to rush and select a yellow value without considering the exact wording. Slow down, make sure you are evaluating BPM rather than the other colored readings, and use the threshold in the laptop documentation as your filter.
For the sequence described here, a yellow number of 161 or 162 is the successful lead. Values within the 40-160 range do not match the criterion needed to proceed.
O2 answer: locate the red SpO2 percentage
The final request is for O2, or blood oxygen. Once again, use the laptop's Equipment Overview menu and read the Valentudo View S-100 entry. Its SpO2 note says that SpO2 (%) values under 75% are unreliable.
Look for the red SpO2 percentage on the monitors. You want the unit displaying a value that clears the unreliable-under-75-percent threshold. In the observed playthrough, the relevant machine displayed 81%, then changed to 80% when the answer was reported.
As with the first two steps, this one-point shift does not mean the solution has changed. Identify the correct monitor by comparing its red oxygen percentage with the manual, then use the reading shown during the reporting interaction. An 81% reading moving to 80% still meets the clue's requirement that the measurement not be below 75%.
Vital signs puzzle answer summary
If you need a quick reminder while standing in the room, use the laptop to confirm each rule and match it to the relevant display color:
- Blood pressure: Check the green paired reading. A successful monitor may show 71/39 or 70/40.
- Pulse: Check the yellow BPM reading and use the monitor outside the 40-160 BPM range. The correct value may appear as 161 or 162 BPM.
- O2 / SpO2: Check the red percentage and avoid readings below 75%. The valid monitor may display 81% or 80%.
These values can vary slightly during the interaction, so the laptop's reliability notes are more important than expecting every screen to hold a single unchanging number.
What happens after reporting all three readings
Once the doctor has received the blood pressure, pulse, and O2 values, the next room opens and the vital signs section is complete. The following challenge is an X-ray puzzle. It continues the same general approach as the medical-monitor sequence: read the available instructions carefully, identify what the game is asking you to evaluate, and avoid assuming that the most obvious interaction is automatically the correct one.
The vital signs room is therefore a useful lesson for the puzzles that follow. Townfall places crucial information in environmental documents and equipment menus, while the nearby machinery provides the data needed to act on that information. The safest route is always to consult the documentation first, match the correct color-coded readout to the doctor's request, and account for minor live changes in the monitor values before reporting your answer.
Community
Discussion
Start the conversation.
No comments have been posted yet.