

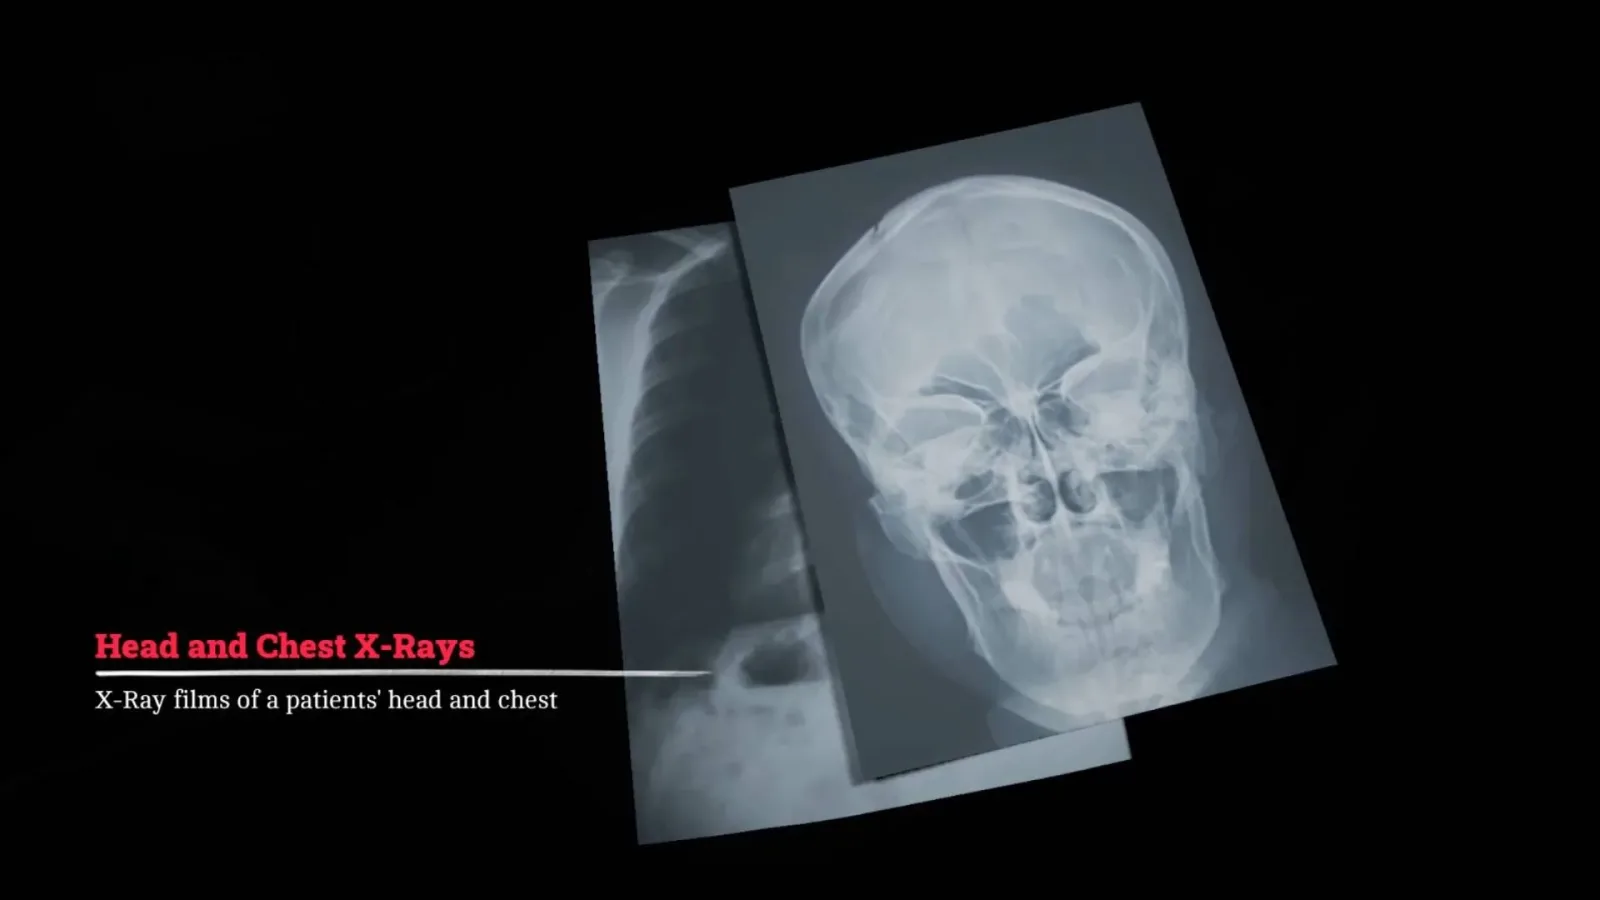
The X-ray puzzle in Silent Hill Townfall asks players to do more than simply press a button. In a clinical room filled with equipment, the objective is to capture scans of a patient's skull and chest. Completing the task requires careful positioning of the machine, checking a dosage reference on a nearby laptop, and entering the appropriate values on the X-ray control panel.
It is a deliberately technical puzzle, following the earlier vital-signs sequence involving blood pressure, pulse, and oxygen readings. The game presents several pieces of information at once, so it is easy to lose track of which controls govern the exposure and which values belong to each body site. Fortunately, the solution comes down to two successful scans: one for the skull and one for the chest.
After both images have been taken and printed, they can be placed on a light box and communicated to the doctor through the intercom. That clears the way for the next objective, which sends players looking for infusion drugs during a longer, more dangerous stealth-focused section.
How to begin the X-ray puzzle
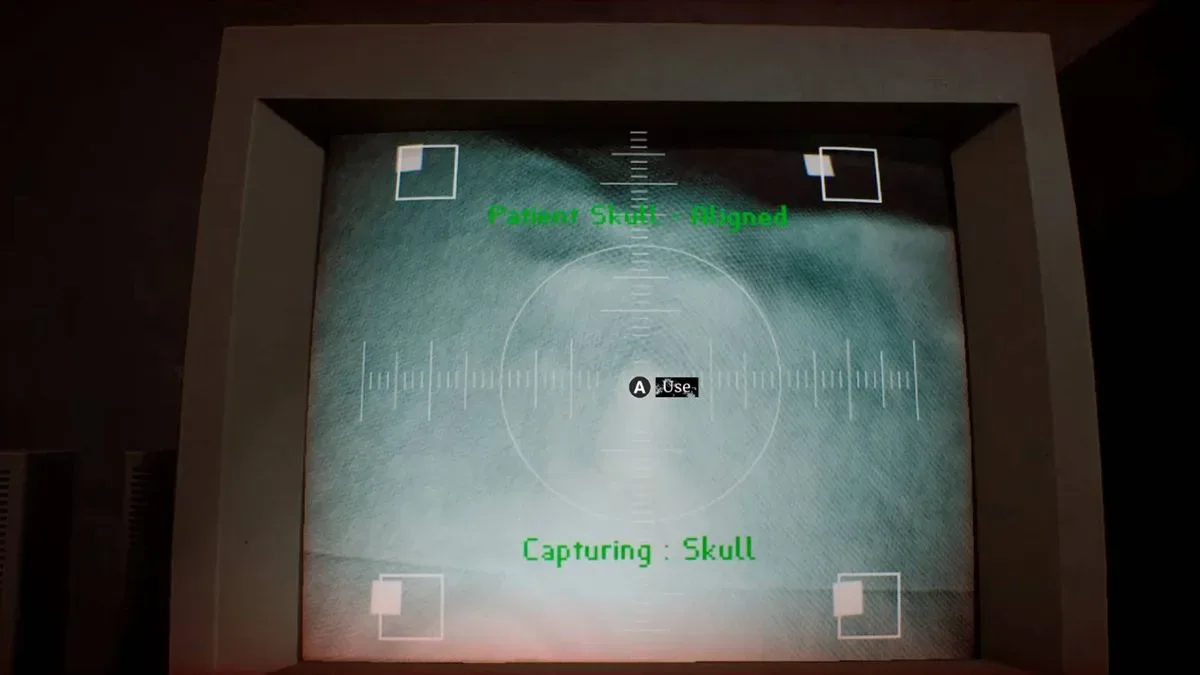
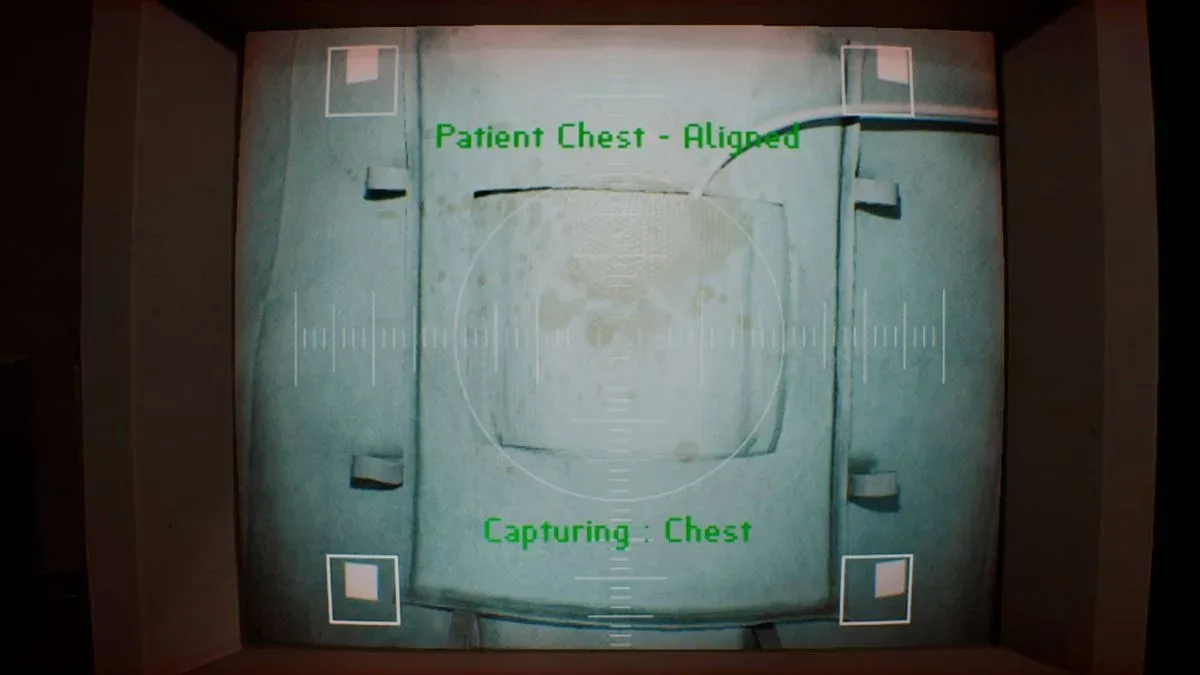
Before changing any of the X-ray machine's settings, turn on the computer associated with the imaging equipment. The initial camera view will not immediately show a visible head, because the patient is covered by a cloth. Instead, the important visual clues are a set of small white alignment squares.
For useful background on this topic, read Silent Hill Townfall Scales Puzzle Guide: Find Every Item and Set the Correct Order.
Move the image until those markers line up correctly with the machine's view. The game confirms the proper placement with the message "Patient Skull - Aligned." Do not proceed just because the patient appears roughly centered; the explicit alignment confirmation is the key indication that the scan position is valid.
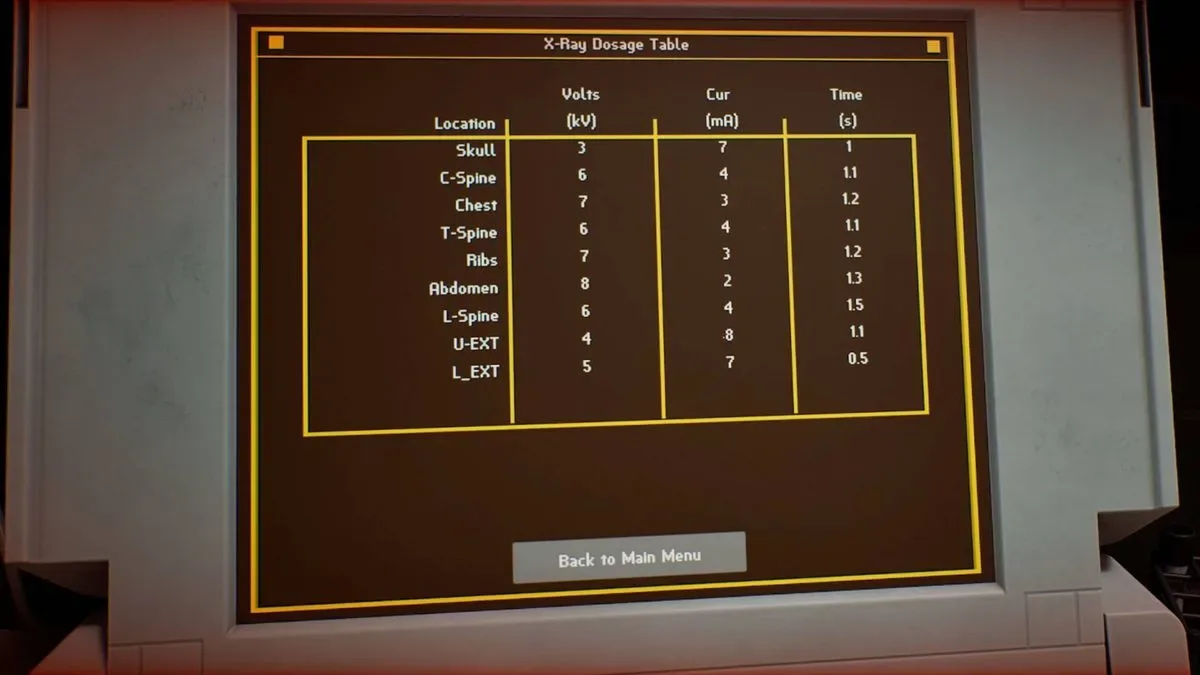
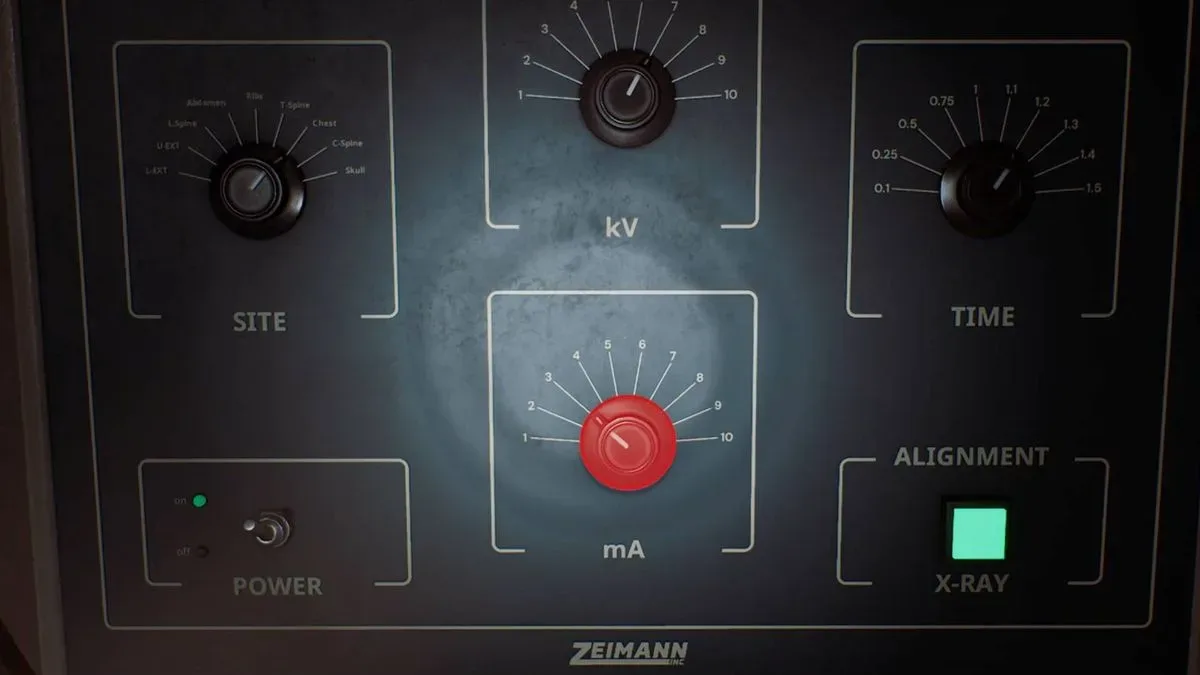
Once the skull is aligned, activate the X-ray machine itself using the power switch on the control panel. The machine must be switched on before the scan can be performed, but there is one more important preparation step: read the X-ray Dosage Table on the laptop in the adjacent room.
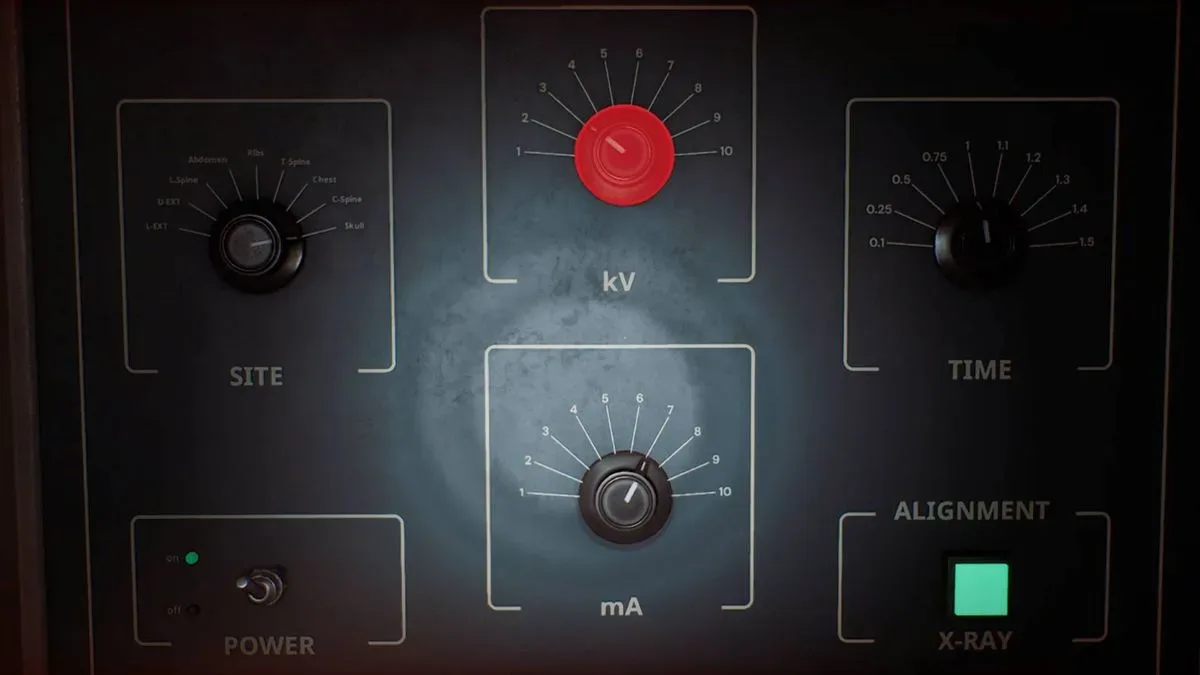
That table provides the needed exposure values for the available sites. Rather than experimenting with the dials, use the listed skull values exactly. The controls include the selected site, kV, time, and mA. Each one needs to match the dosage table before the green scan button will advance the puzzle correctly.
Skull X-ray settings
With the machine powered on and the camera reporting that the skull is aligned, set the control panel to the following configuration:
- Site: Skull
- kV: 3
- Time: 1
- mA: 7
Take a moment to verify all four entries before using the green X-ray button. In particular, the numerical controls can be confusing when players are moving quickly between the laptop instructions and the machine. A correct site selection alone is not enough, and matching only the kV and mA settings will not complete the scan if the time remains incorrect.
After entering Skull, 3 kV, 1 time, and 7 mA, press the green button to capture the image. If the position and settings are correct, the puzzle moves on to the chest scan. If it does not, recheck that the camera was aligned to the skull markers and that the X-ray unit was powered up before the exposure was attempted.
How to align the chest scan
The second half of the puzzle uses the same workflow, but the machine must be moved lower. Return to the camera view and shift the imaging position down the patient's body. This time, look for the lower set of white squares around the panel where a wire enters.
As with the skull scan, the markers are more reliable than trying to judge the patient's body placement through the covered view alone. Carefully adjust the machine until the lower alignment target is correctly framed. Once it is in place, return to the dosage information and prepare the panel for the chest exposure.
Players should not reuse the skull configuration. The chest requires a substantially different combination of voltage, exposure time, and current. Leaving even one skull value in place will prevent the intended result, so it is worth treating this as a complete reset of the panel settings rather than a minor adjustment.
Chest X-ray settings
For the chest image, configure the X-ray controls as follows:
- Site: Chest
- kV: 7
- Time: 1.2
- mA: 3
In short, the chest scan requires Chest, 7 kV, 1.2 time, and 3 mA. The fractional time value is especially easy to overlook after the skull scan uses a whole number. Make sure the control reads 1.2 rather than 1 before pressing the green button.
Once the chest is aligned and every dial matches those values, use the green X-ray control again. A successful exposure makes hard copies of the two scans available from the printer positioned at the back of the room.
What to do with the printed X-rays
Collect the printed images after the chest scan is complete. The puzzle does not end the moment the machine produces the pictures. The next required step is to bring the hard copies to the light box mounted on the wall in the other room.
Place the scans on the light box so their details can be viewed, then relay what they show to the doctor through the intercom. This is the final handoff for the X-ray sequence. The imaging equipment, dosage table, printer, and light box all serve one connected process, so missing the printed-image step can make it seem as though the puzzle has stalled despite both exposures being correct.
Quick X-ray puzzle solution
For players who only need the essential answers, the complete order is straightforward:
- Turn on the computer and position the imaging view until it confirms "Patient Skull - Aligned."
- Power on the X-ray machine at its control panel.
- Set the skull scan to Site: Skull, kV: 3, Time: 1, mA: 7.
- Press the green X-ray button.
- Move the camera view down to the lower white alignment markers for the chest.
- Set the chest scan to Site: Chest, kV: 7, Time: 1.2, mA: 3.
- Press the green X-ray button again.
- Pick up the hard-copy scans from the printer.
- Put the images on the light box and report the findings via the intercom.
Common mistakes to avoid
The most likely problem is positioning the machine without waiting for the alignment confirmation. The skull is hidden beneath a cloth, and the chest target is defined by environmental markers rather than an obvious anatomical view. Use the white squares and the on-screen confirmation instead of guessing.
A second common error is forgetting that the laptop's dosage table applies to separate body sites. The first scan's settings are not a general-purpose solution. Skull uses low kV with higher mA, while the chest calls for higher kV, a 1.2 time setting, and lower mA.
Finally, remember that the green button captures the scan only after the machine is powered and configured. If the sequence does not progress, check the power switch, the selected site, the camera alignment, and every numerical value in that order.
Completing this medical-room task opens the next stage involving infusion drugs. That section shifts away from the contained equipment puzzle and into a more extended exploration challenge across multiple floors, with stealth posing a greater threat. For now, the X-ray solution is simply about precision: align the skull, use 3/1/7; align the chest, use 7/1.2/3; print the results; and deliver the information through the intercom.
Community
Discussion
Start the conversation.
No comments have been posted yet.