


Bai Chilian, known as the Lady of the Twin Serpents, is one of the more demanding story bosses in Phantom Blade Zero. Her speed, sudden teleports, wide-reaching ribbon attacks, and aggressive follow-ups can make the encounter feel chaotic at first. The fight is not simply about reacting faster, though. It is built around recognizing when she wants to control space, when she is committing to melee pressure, and when it is safer to defend rather than trying to force an opening.
There are two distinct stages to the battle. The first pits you against Bai Chilian in her humanoid form, while the second begins after her health bar has been depleted and she changes into the Sacrificial Serpent. The latter has a substantially different moveset, but the central principles remain familiar: manage distance, protect your Sha-Chi, build pressure through defense, and capitalize immediately when her guard breaks.
This is a mandatory story encounter, meaning progression is blocked until Bai Chilian is defeated. Players who have already handled the Three-Faced Puppet should have the defensive fundamentals needed to prevail, but Bai Chilian asks for cleaner positioning and more restraint. Here is how to approach both phases, along with the useful equipment, major threats, and rewards waiting after the fight.
Prepare for a defensive, patient fight
The most important adjustment against Bai Chilian is resisting the urge to constantly chase her. She alternates between ranged pressure and close-range combinations, and running toward her at every opportunity can put you directly in the path of attacks that are much easier to deal with when she initiates the approach.
For useful background on this topic, read Wardogs Developer Bulkhead Plans Full December Break After Early Access Push.
Instead, allow her to close the distance. Meet her advance with blocks and, where the timing feels consistent, parries. Successful defense helps wear down her Sha-Chi bar. Once that guard is broken, the momentum shifts sharply in your favor and you can deliver a sustained burst of damage.
This does not mean remaining passive for the entire encounter. It means choosing attacks based on a confirmed opening rather than trying to manufacture one while Bai Chilian is teleporting, moving unpredictably, or preparing a ranged sequence. Her fast motions are intimidating, but many standard strikes have readable startup animations. Spend the opening moments observing those tells and learning which attacks you can reliably answer.
Phase one: fighting the Lady of the Twin Serpents
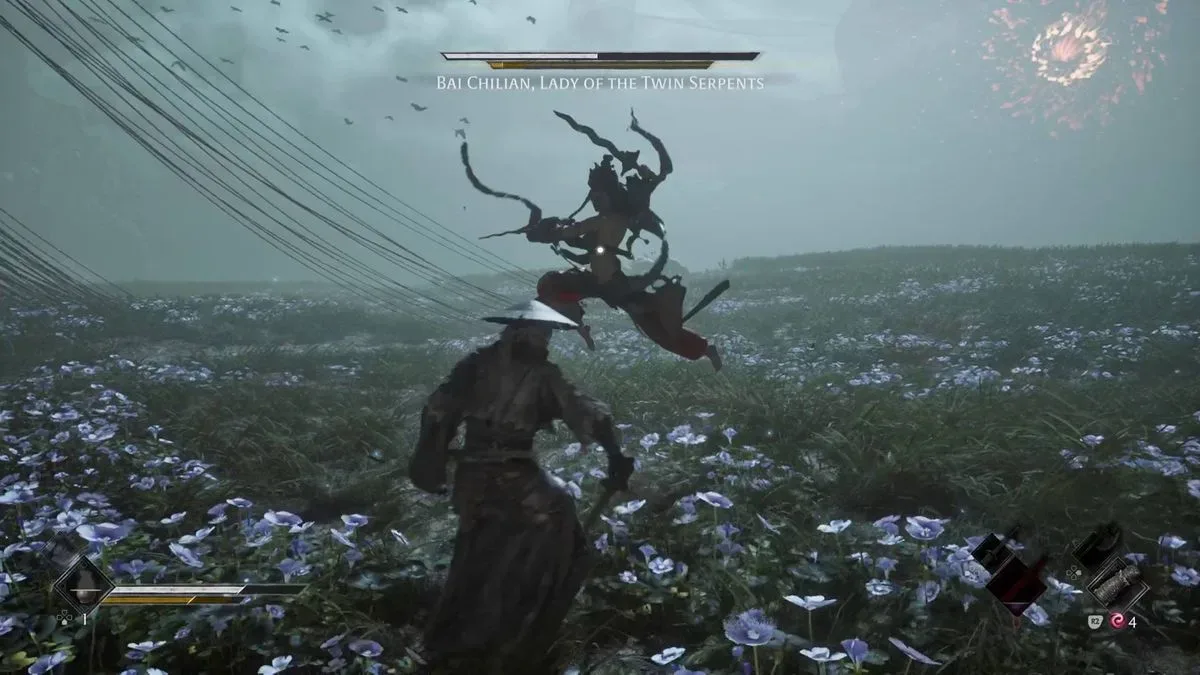
In her initial form, Bai Chilian uses a mix of conventional melee offense, displacement, teleports, and enormous ribbon snakes. Her movement can make tracking difficult, especially when the camera follows her sudden repositioning. Keep your character oriented toward open space whenever possible so that an evasive move does not send you into a wall or leave you unable to see the next attack.
Let Bai Chilian dictate the initial engagement
Her ranged and melee patterns are designed to punish reckless pursuit. If you sprint in whenever she moves away, you risk arriving just as she starts an attack string. Waiting for her to rush you gives you a clearer view of her windups and makes blocks or parries more dependable.
Defensive exchanges are valuable beyond avoiding damage. They create the Sha-Chi pressure required to expose her. When the guard break arrives, commit to your strongest attacks rather than settling for a few cautious hits. The fight becomes much more manageable when each defensive sequence is converted into meaningful offense.
Dodge the ribbon snakes rather than challenging them
Several of Bai Chilian's attacks create giant snakes formed from ribbons that crash toward your position. These are best treated as area-denial attacks. Move out of their impact zones quickly, using repeated dodges if necessary. Trying to stand your ground or squeeze in an attack can be costly, particularly if the camera is dragged around by Bai Chilian teleporting during the sequence.
There is no need to make these moments elegant. A frantic retreat is preferable to taking a devastating hit. Focus on clearing the danger zone first, then re-center the camera and prepare for her next approach.
Respect the black-and-white warning and red-flash follow-up
The most dangerous part of phase one is a Sha-Chi-draining strike that is signaled by the screen briefly shifting into black and white. Bai Chilian can rapidly connect this into a lethal attack marked with a red flash. The danger is heightened because she may begin the sequence immediately after teleporting, making it easy to lose sight of her and get caught by surprise.
There is no single flawless counter that removes the threat altogether. The safest habit is to stay ready to dodge sideways whenever she vanishes or begins an unfamiliar burst of pressure. Do not assume that a teleport is merely a repositioning tool. It may be the start of her most punishing sequence.
Recommended weapons for phase one
Jagged Steel is a particularly strong choice against Bai Chilian because she is a human opponent and can suffer its bleed effect. Once you have broken her guard, use that opening to attack aggressively and stack significant damage before she recovers.
The Outlaw Warblade is another effective option, though it comes with considerably more risk due to its self-wounding properties. It can pay off for players who are comfortable with the trade-off, but it is less forgiving when Bai Chilian is already threatening to drain Sha-Chi and punish mistakes. The Wooden Sanguine remains useful as well, especially for players who want a familiar tool for parrying through this section of the game.
Phase two: defeating the Sacrificial Serpent
After Bai Chilian's first health bar is gone, she transforms into the Sacrificial Serpent for a second fight. Fortunately, there is a checkpoint between the two phases, so failure here does not require repeating the entire first stage.
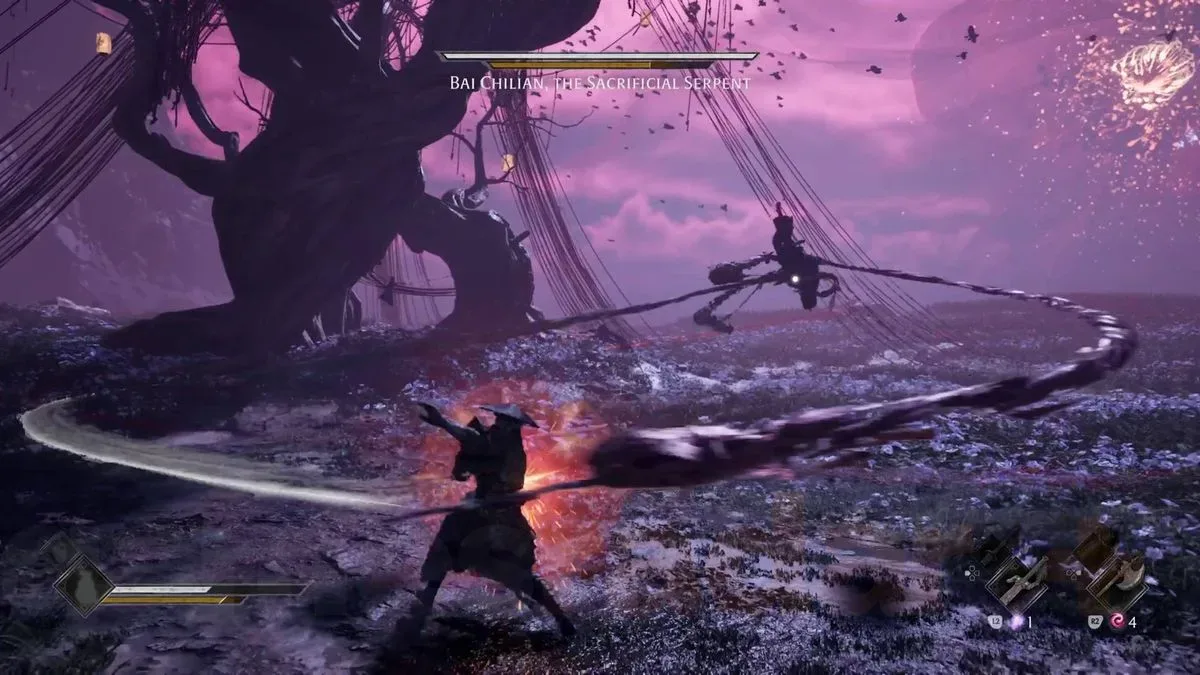
Her new form moves with puppet-like strings and introduces a more erratic attack rhythm. While the same broad strategy of defense leading into guard-break punishment still applies, phase two demands more flexibility. Some attacks are so quick or unusual that a block is more dependable than attempting a high-risk parry.
Block when parry timing becomes unreliable
The Sacrificial Serpent can strike with attached ribbon snakes, producing abrupt sucker-punch attacks that are harder to read than Bai Chilian's more conventional swings. She can also turn herself into a spinning, blender-like projectile and fly around the arena in an attempt to carve through you.
These moves can be parried, but their timing is demanding and may not be worth gambling on if you are still learning them. Raise your guard in anticipation, survive the sequence, and wait for a clearer counterattack opportunity. Maintaining your resources and avoiding a large mistake matters more than forcing an ideal defensive answer.
Close the distance instantly after a guard break
When the Sacrificial Serpent's guard breaks, speed is crucial. If you take more than a moment or two to reach her, she can recover from the stagger, resume moving, and begin attacking before you have converted the opening into real damage.
As soon as you see the break, rush in and start attacking. Quick engagement prevents her from retaliating and lets you score repeated hits while her Sha-Chi builds back up. This is one of the most important differences in practice between surviving the fight and ending up trapped in a long cycle of evasions.
Use the Illusion of the Chord when it arrives
Once roughly 20 percent of the Sacrificial Serpent's health has been removed, an Illusion of the Chord joins the encounter. This assistance makes the latter stretch notably easier, particularly because it helps break Bai Chilian's guard.
At this stage, prioritize staying alive and positioning yourself to exploit the openings created by the ally. There is little value in taking reckless damage just to speed through the last section. With help available, controlled defense becomes even more rewarding.
Ignore the large idle snakes
The second phase adds an attack in which Bai Chilian summons several large, inactive ribbon snakes while sitting among them. It is possible to destroy these snakes individually, and doing so removes a notable portion of her Sha-Chi. However, targeting them is generally less effective than simply staying clear of the danger.
Allow the Illusion of the Chord to fire its large Sha-Chi-damaging projectile, then use the resulting chance to charge directly at Bai Chilian. This approach avoids wasting time on the summoned snakes and better aligns with the fight's main win condition: breaking her guard and punishing immediately.
Rewards and what comes next
Defeating both forms of Bai Chilian grants the Broken Illusory Pipa, an important story item connected to the Whence The Weeping quest. You will also receive the White Serpent & Crimson Viper dual-wield weapon and the Resonance Talisman Accessory. The talisman raises maximum Sha-Chi, making it especially valuable for the difficult encounters that follow.
The victory also closes out the Crimson Forest region, as the story immediately moves you onward to the next area. Before triggering this point of transition, it is wise to make sure you have already handled A Healer's Mercy and completed the Nimble Thief questions. Once Bai Chilian falls, the journey does not linger in Crimson Forest.
Bai Chilian is ultimately a test of discipline. Do not chase every teleport, do not gamble on every parry, and do not waste a guard break. Let her approach, weather the ribbon storms, dodge the devastating teleport follow-up, and respond with force when her defenses collapse. Carry that same measured approach into the Sacrificial Serpent phase, and one of the game's most frantic-looking battles becomes a far more controlled duel.
Community
Discussion
Start the conversation.
No comments have been posted yet.