

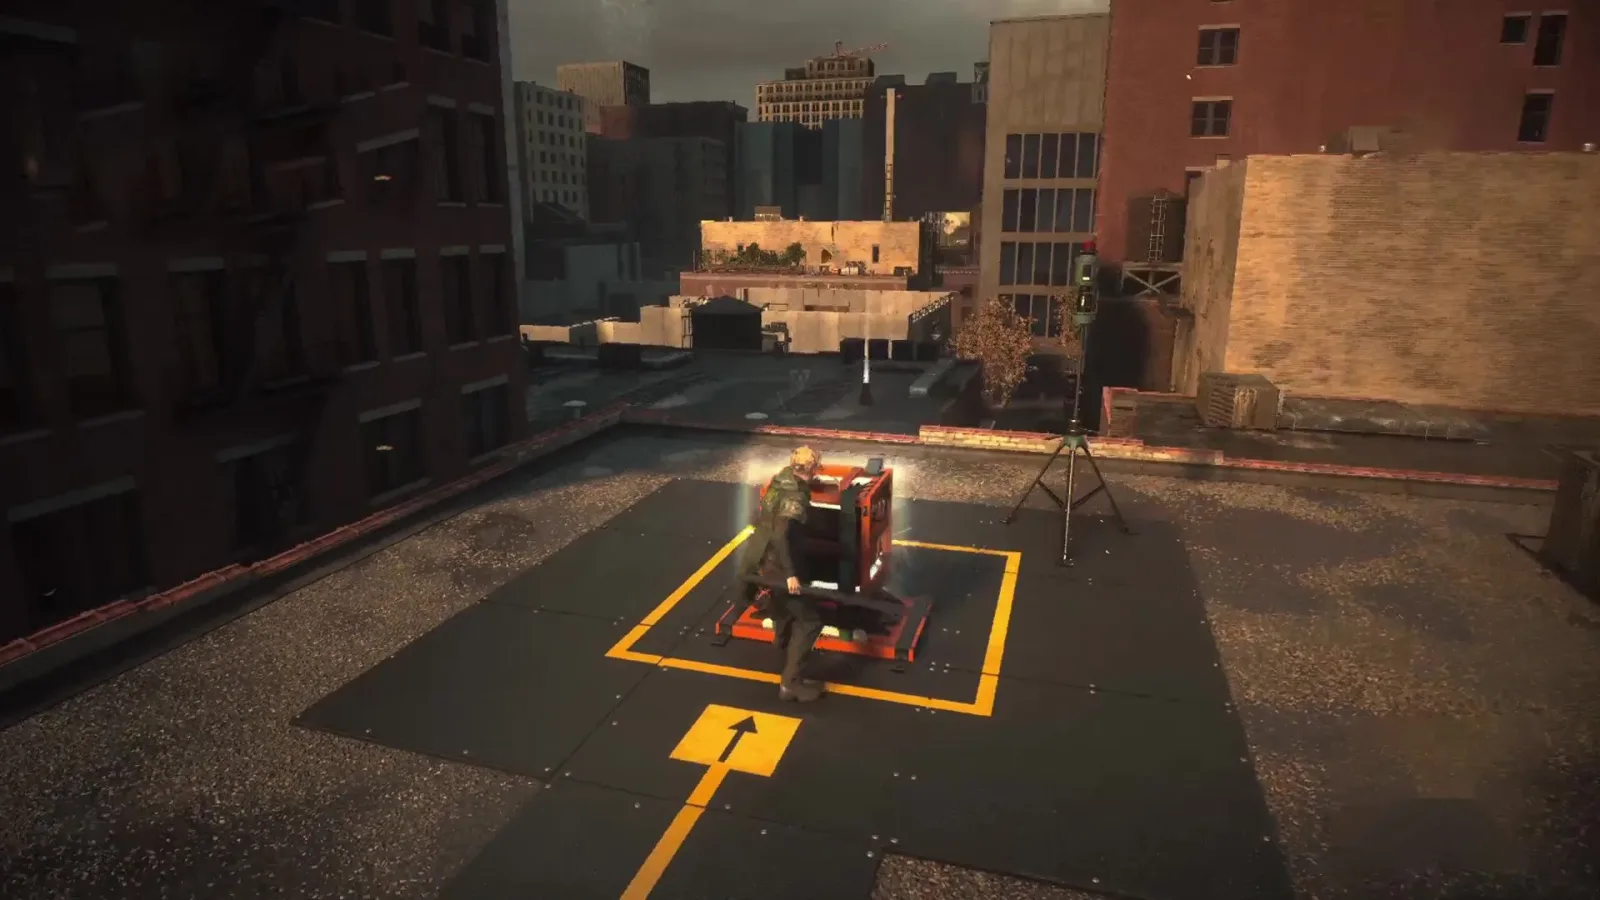
The first major Power Core objective in Control Resonant can be a surprisingly abrupt roadblock. During the early Welcome to Manhattan mission, the game asks you to move an electrical charge to the Power Core at Central Checkpoint. The instruction sounds straightforward: activate the charge by firing at it, carry it to the destination, and restore power. In practice, the charge fades before a direct trip can be completed.
The solution is not to find a hidden shortcut or somehow make the charge last longer. Instead, this objective teaches the relay system that underpins Power Core puzzles. You need to move the charge through several intermediate Power Cores, refreshing its timer at each stop until you can finally reach Central Checkpoint.
How to get the charge to Central Checkpoint
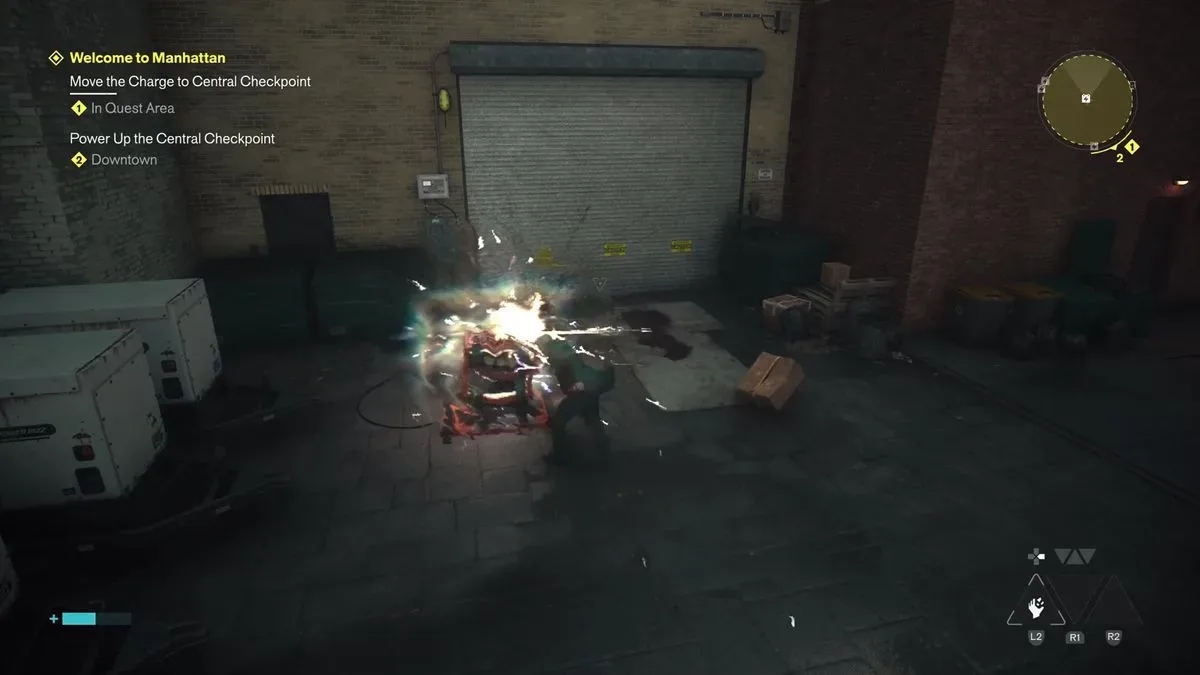
To complete the Central Checkpoint objective, begin at the initial Power Core and activate the electrical charge by shooting it with your weapon. Once the charge is active, move immediately toward the next available Power Core rather than attempting to run directly to the final marker.
When you reach another Core, transfer the charge into it. This is the vital step: depositing the charge resets its limited duration. You can then take the refreshed charge from that Core and continue onward to another one. Repeating that process creates a chain of powered stops between your starting position and Central Checkpoint.
For useful background on this topic, read Control Resonant Orb Distortions Explained: How to Unlock Reach.
In short, the intended sequence is:
- Activate the charge at the starting Power Core.
- Carry it to the next nearby Core.
- Transfer the charge to reset its timer.
- Collect the renewed charge and head to another Core.
- Continue relaying it until you arrive at the Central Checkpoint Power Core.
Trying to cover the entire distance in one run is why the task appears impossible at first. The charge is deliberately short-lived, and the network of Cores is designed to bridge that gap.
Find the Power Core Servicing Diagram first
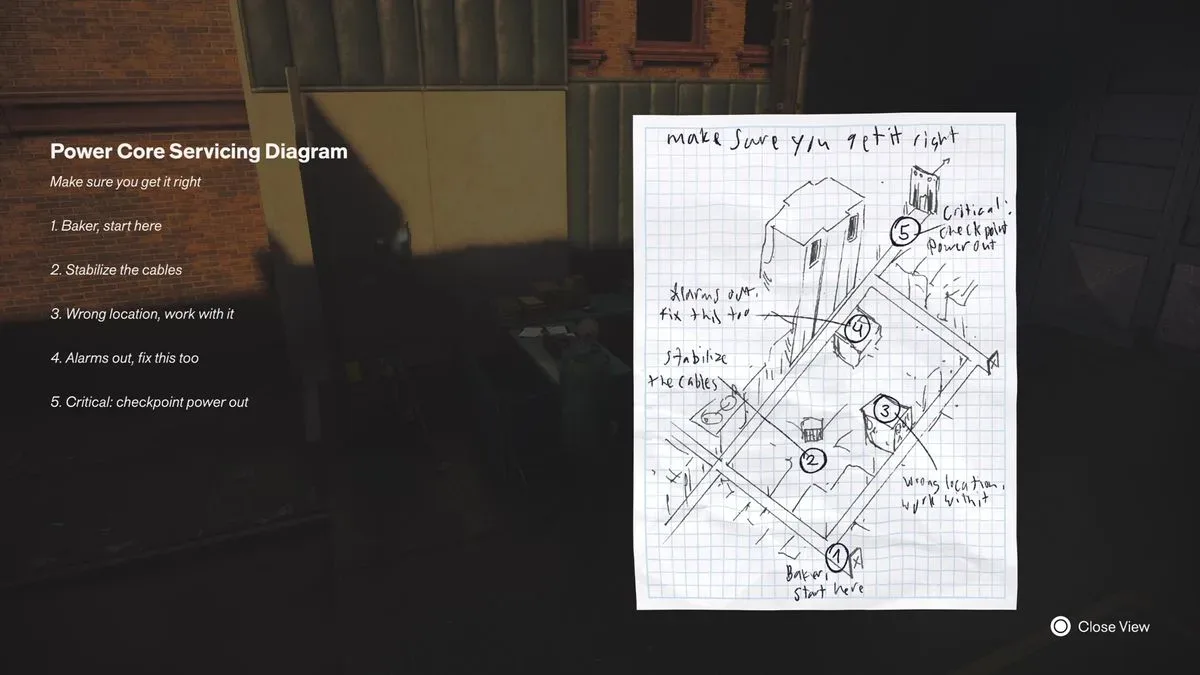
The most useful clue for this puzzle is the Power Core Servicing Diagram, a document located near the starting area. It identifies the Power Core positions between your initial location and Central Checkpoint. Treat it as a route-planning tool rather than just a piece of optional background information.
The diagram establishes the central idea behind the puzzle: Central Checkpoint is not meant to be reached from the first Core in a single uninterrupted sprint. The intervening Cores are relay stations. Once you understand that, the goal becomes a navigation exercise focused on choosing the fastest practical order of stops.
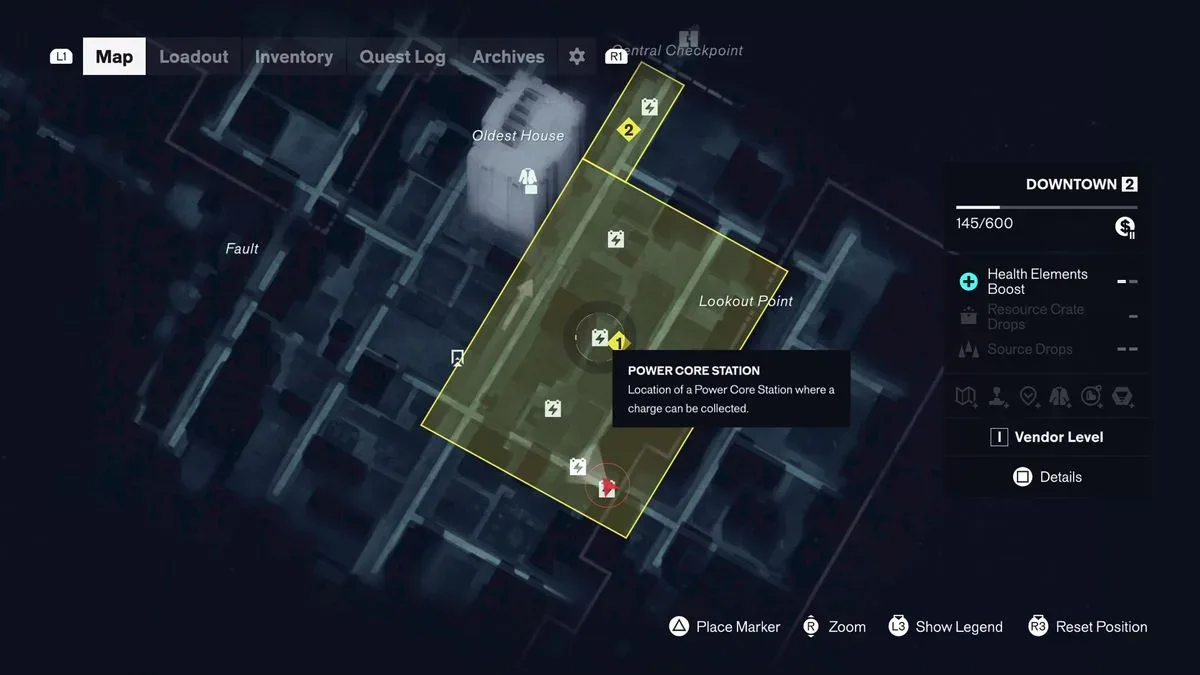
If you have already picked up the diagram but did not immediately understand its purpose, return to the map and compare the route with the Power Core symbols around Downtown. The visual markers make it much easier to recognize which Core should be your next destination.
Use the map to plan your relay path
Open the Control Resonant map and look for the box-shaped icons marked with electrical symbols. These identify Power Cores, including the one holding the initial charge. The objective is to connect those icons into a route that leads toward Central Checkpoint.
Before activating the charge, take a moment to examine where the next Core is and how you will get there. That brief planning step matters because the charge timer does not leave much room for hesitation. A wrong turn, a missed entrance, or a scramble to locate a rooftop access point can be enough to make the charge dissipate.
A useful approach is to identify more than just the next stop. Work out at least the first few legs of the route before you start. Knowing where you are going after each transfer reduces the time spent checking the map while the timer is running. The aim is not necessarily to memorize every street and rooftop, but to avoid making navigation decisions while carrying a fading charge.
Watch for vertical routes
Some Power Cores are positioned on rooftops. Those locations are especially important to account for in advance, since reaching them may require finding the correct route up or down rather than simply following the most direct horizontal line on the map.
At this stage of Welcome to Manhattan, your traversal options are still limited. That makes vertical movement a bigger part of the challenge. A Core may look close on the map while still requiring a longer approach to find its rooftop access. Plan your ascent or descent before you activate the charge, and keep moving once you begin the relay.
Transfer the charge at every Core
The main rule of the puzzle is simple: do not run past a Power Core that is part of your route. Every relay point exists to refresh the charge timer. When you reach one, transfer the charge before moving on.
It can be tempting to skip a stop if Central Checkpoint appears close, particularly after gaining a bit of ground. That is risky. The charge does not last long enough to support a casual shortcut, and missing a refresh point usually means you will lose the charge and need to restart from the previous Core.
Think of each Power Core as a checkpoint for the charge itself. Your character may physically travel through the area without difficulty, but the electrical energy needs to be repeatedly anchored and renewed. The Core network is therefore part of the route, not scenery along the way.
The charge is a relay payload: move quickly, deposit it at each Power Core, then collect a refreshed charge for the next stretch.
Should you fight enemies while carrying the charge?
Generally, no. The Central Checkpoint Power Core task is a timed movement puzzle, and combat works against that goal. You do not need to clear enemies in order to advance the charge through the relay route. Stopping to fight costs precious seconds and increases the chance that the charge will vanish before you reach the next Core.
When possible, sprint past opposition and prioritize the next electrical marker. This is particularly useful early in the game, when you have not yet gained many mobility tools or powers that could make detours and encounters easier to manage.
That does not mean every encounter will be entirely avoidable, but the puzzle's priority is clear: preserve momentum. If an enemy threatens to slow you down, look for a path around rather than treating it as a required fight. The objective is completed by delivering power, not by eliminating every hostile presence between the Cores.
What to do if the charge disappears
If the charge dissipates, do not assume the puzzle is bugged or that you missed an entirely separate mechanic. Its disappearance is the game's signal that too much time passed between Power Cores. Return to the last usable Core, reactivate or collect the charge as needed, and try again with a more direct route.
On a retry, focus on the reason the attempt failed:
- Ran out of time before the next Core: Check the map and use a closer or more efficient relay point.
- Got lost on the way upward: Identify the rooftop access route before activating the charge.
- Lost time in combat: Avoid enemies and keep sprinting.
- Skipped a relay Core: Transfer the charge at every relevant stop to reset the timer.
- Paused to orient yourself: Plan several steps ahead using the Power Core symbols and servicing diagram.
Because the route includes multiple Power Cores, a failed attempt is usually an opportunity to improve your path rather than a sign that you need stronger abilities. The early timing pressure is intentional and encourages you to learn how the system works.
Why this puzzle matters beyond Welcome to Manhattan
The Central Checkpoint challenge is an early lesson in a mechanic that appears throughout Control Resonant. Power Cores and related puzzles recur elsewhere, so understanding the relay concept now will save time later.
Whenever an electrical charge seems unable to survive the distance to its destination, look for other Power Cores in the surrounding area. Check documents, map icons, and the environment for clues pointing toward a chain of stations. The basic logic remains the same: activate the charge, move it efficiently, refresh it at a Core, and continue until the final device can be powered.
The puzzle also establishes a broader habit that will help with future exploration. Do not judge a route only by straight-line distance. In areas with rooftops, streets, and limited early traversal, the fastest real path may be one that appears longer on the map but avoids difficult climbs, enemy interruptions, or dead ends.
Central Checkpoint Power Core puzzle recap
To move the charge to Central Checkpoint in Control Resonant, use the Power Core Servicing Diagram and the map's electrical Core icons to form a relay route through Downtown. Shoot the starting charge, sprint to the next Core, transfer it to refresh the timer, and repeat until you reach the final Core at Central Checkpoint.
Do not try to make the full journey in one attempt, and do not spend time fighting enemies that are not blocking progress. Plan for rooftop Cores before starting, keep the route moving, and use every necessary Core as a recharge point. Once that process clicks, the confusing early objective becomes a clear introduction to one of the game's recurring puzzle systems.
Community
Discussion
Start the conversation.
No comments have been posted yet.